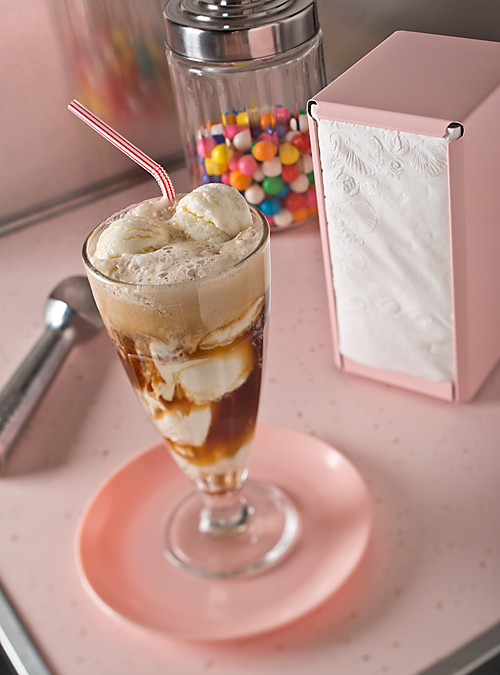
Creamy Root Beer Float

With summer fast approaching, warm weather activities and fun in the sun can’t be too far off. The grill comes out of storage and our minds turn to BBQs and summer salsa. Refreshing drinks are the order of the day, with home-made lemonade for the kids, and sangria for the grown-ups. And who doesn’t enjoy a nice chocolate shake? Or my favorite, a creamy root beer float.

root-beer-float-139

They’re simple to make, right… just vanilla ice cream and your favorite root beer! But why not get the kids involved and try making your own fresh root beer at home. Not only is it a fun learning activity that will keep your family busy on a rainy afternoon; but unbeknownst to them they’ll be doing a science project at the same time. My root beer making kit was gifted to me by my wife, but you can order them online and have them ready for that inevitable dreary day. Then when the sun finally does comes out, it’ll be root beer float smiles all around !

Joe

3 Comments

Filed under Drinks, Shakes & Smoothies, Uncategorized

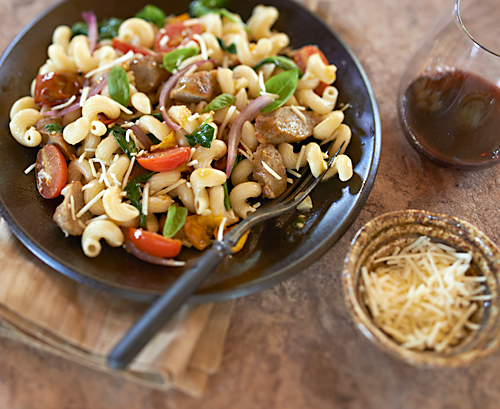
Savory Cavatappi with Pork Sausage and Veggies


I truly love discovering quality foods to cook with…recently I came across Applegate Farms Breakfast Sausage at my local Whole Foods Market.  The sausages are really, really, really good. Really. So, I thought, why limit myself to just breakfast?  Inspired by my dad’s recipe for a 1960s favorite—Egg Noodles and Sausage Toss—I devised this recipe. It’s a hit, except with my son who dislikes green things in his food. Oh well, like so many good-for-you foods, in Sam’s case, the spinach is optional.

Savory Cavatappi with Pork Sausage & Veggies

(serves 6)

  • 1 package (16 ounces) Cavatappi (corkscrew) pasta (or try bowties, penne, etc., any shape will do!)
  • 4 tablespoons good quality olive oil, divided
  • 1 package (8 ounces) Applegate Farms Classic Pork Breakfast Sausage
  • 1 medium red onion, sliced
  • 2 large cloves garlic, chopped
  • 8 ounces grape or cherry tomatoes (any colors and varieties), halved
  • about 6 ounces  baby spinach leaves, rinsed and dried
  • 1/2 cup shredded Parmesan cheese
  • salt and pepper to taste
  • small basil leaves, optional

Cook the Cavatappi according to package directions. Before draining it, reserve 3 tablespoons of the cooking liquid. Drain the pasta and transfer it to a large bowl. Drizzle it with 2 tablespoons of the olive oil and the reserved cooking liquid, and toss. Cover the pasta to keep it warm.

While the pasta is cooking, add 2 tablespoons olive oil to a large skillet, and saute the sausage  over medium low heat. Remove the sausage to a cutting board.  Slice the sausage diagonally into 1 inch pieces.

Keeping the heat on medium low, add the onions and garlic to the pan, and saute them for a few minutes until they soften.  Add the tomatoes and cook them for 2 minutes, then add the sliced sausages. Next, add the spinach and cook it until it just begins to wilt. Be careful not to overcook it, since it will become mushy and lose its brilliant green color.

Pour the sausage mixture over the pasta, and gently toss it. Sprinkle it with the Parmesan cheese, then add salt and pepper to taste, and  toss it again.

If you like, add some small basil leaves and a sprinkling of extra Parmesan cheese to each serving.

This recipe lends itself to all kinds of good veggie variations, so have fun experimenting!

Heather

3 Comments

Filed under Entertaining, Pasta, Pork, Sausage, Vegetables

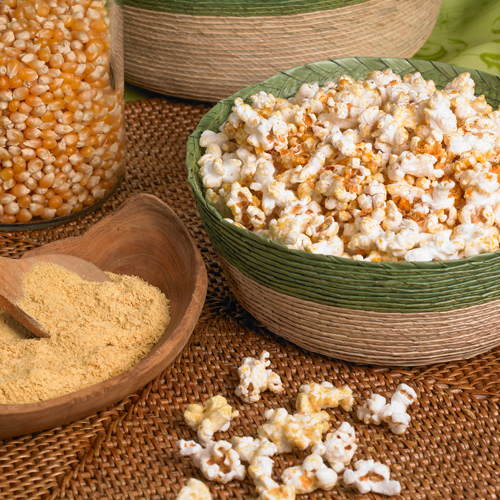
Not Just for Vegans….Nutritional Yeast

Does Nutritional Yeast sound good to you? Me either. But, I was introduced to it recently, and guess what? It’s actually really good—and better yet, it’s good for you.

Sugar-free, dairy-free, & gluten-free, nutritional yeast is naturally low in fat and sodium. Since it has a cheesy, nutty flavor, it works as a cheese replacement in many recipes, making it a vegan’s best friend. Since it’s healthy and tasty, I’ve made friends with it too.

So, what the heck is it? Well, for the full scientific explanation, check it out on Wikipedia….but in short, it’s a deactivated yeast sold as powder or flakes. It’s a source of protein and vitamins, and it’s often available fortified with vitamin B12.  You can find nutritional yeast in health food stores….I bought it at Whole Foods. It’s not cheap, but neither is cheese, and a little goes a long way.

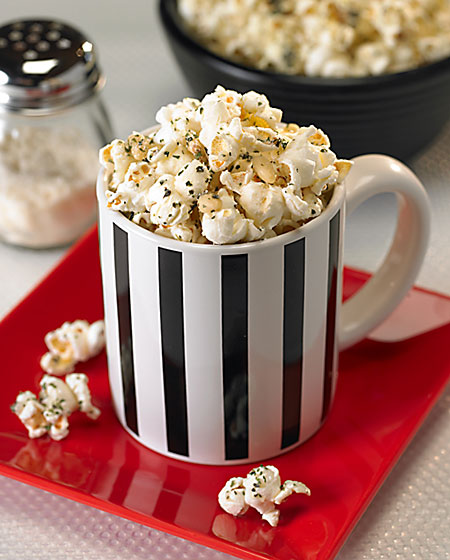
I’ve used nutritional yeast in pesto, I’ve breaded chicken cutlets with it, and I’ve sprinkled it and on pasta and salads. Nutritional yeast makes a really tasty topping for popcorn, too, plus you can really enjoy it knowing it’s good for you.

Not-So-Cheesey Popcorn

(makes eight 1-cup servings)

  • 8 cups air-popped popcorn
  • 1/4 cup nutritional yeast
  • 1/4 teaspoon garlic powder
  • 1/2 teaspoon onion powder
  • 1/4 teaspoon cayenne pepper, or to taste
  • • 2 tablespoons of melted clarified butter, or 2 tablespoons of a vegan spread, melted
1. Place the popcorn in a large bowl.
2. Mix the nutritional yeast, italian seasoning mix and garlic powder together in a small bowl.
3. Drizzle the melted butter over the popcorn and toss it.
4. Sprinkle on the nutritional yeast mixture and toss again.
5. For a little extra zip, sprinkle on a little Cajun seasoning.

2 Comments

Filed under Appetizer, Entertaining, Popcorn, Snacks, Vegetarian

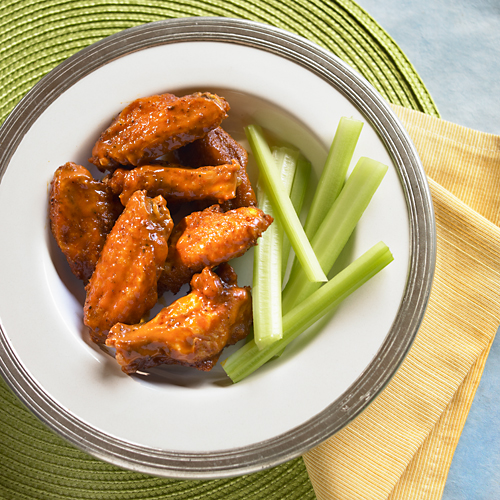
Just Wing It !

There was a time in most of our lives when “take-out” was the rule of the day. Pizza, Chinese food, Buffalo wings, Mexican and more were often the meal of choice for my college friends and me. Back then “cooking-in” usually meant a dinner of Ramen noodles or scrambled eggs, and for some, even microwave popcorn was a meal.

It’s my impression that few “x-gens” and “baby boomers” today have ever attempted to cook their college “take-out” staples at home. Perhaps it’s been so ingrained in our psyches that these favorite foods are too time-consuming or difficult to prepare—and why bother when you’ll probably never achieve that perfect “take-out” flavor anyway?

My old college roommate Delton had no such fears. He was always willing to try his hand at something new, even Buffalo style chicken wings. As I recall, the kitchen looked like a bomb had gone off when he had finished preparing, but that hardly mattered once you took a bite of his wings. They were simply slammin’!

Now-a-days, I rarely see Delton, as he is usually off leading some white-water adventure in Africa. We caught up recently and he was good enough to share some of his best tips for making Buffalo style chicken wings at home.

You can deep fry ’em and go hot & spicy, or bake them up lite with some mild heat. Either way don’t fret it, skip the take-out, and just wing it!

Thanks “D”

Dj’s Buffalo Style Chicken Wings

  • 1 dozen wings
  • Canola oil for deep-frying
  • Cajun seasoning
  • (or make your own rub with 1/4 teaspoon each of garlic powder, paprika, & cayenne pepper; plus a dash of salt & pepper.
  • 1/2 cup Frank’s™ RedHot™ “Hot Buffalo Wings Sauce” (Frank’s™ was the secret ingredient used in the original Buffalo Wings created back in 1964).
  • 1/4 cup butter
  • celery salt
  • 1/2 teaspoon white vinegar
  • all-purpose flour
  1. If chicken wings are whole, divide them at the joints into three pieces, keeping the drumettes and wings, and discarding the wing tip.
  2. Rub your favorite Cajun seasoning onto wings, or prepare your own rub of garlic powder, paprika, cayenne pepper, salt & ground black pepper.
  3. Cover and allow to season in fridge for at least an hour or so (very important)
  4. Heat canola oil to 375˚ in deep-fryer.
  5. Melt butter in small saucepan; stir in Franks’s™ RedHot™ sauce and a few shakes of celery salt. For a bit more tang, add 1/2 teaspoon of white vinegar (optional).
  6. Once seasoned, remove wings from fridge and deep-fry at 375˚ for 10 minutes.
  7. Place cooked wings in glass (or other non-porous) mixing bowl and stir in warm hot sauce.
  8. Serve immediately with celery sticks and blue cheese dressing.

Alternatively, dust seasoned wings with all-purpose flour and place on foil-lined tray. Bake at 500˚ for 20 minutes until fully cooked (lightly browned & slightly crispy). Mix wings with hot sauce and serve.

– Joe

4 Comments

Filed under Appetizer, Chicken

Party Cake Pops

Every year when the kids’ birthdays roll around, my wife Carol tries something different to celebrate. As a creative director, she is, well, pretty creative, so I’m always expecting something new & exciting. This year she decided to try her hand at making cake pops.

Cake pops have been “all the rage” ever since Angie Dudley of Bakerella fame published her recent book. Although Angie forms her pops from crumbled cake, Carol decided to try baking them from a set of Bake Pop trays. Carol also wanted her pops to have a soft exterior coating of frosting, rather than the harder candy melt surface that Angie suggests. Either way, cake pops are all about the decorating, and, as you can see from our photo above, anything goes!

You will need…

  • cake mix
  • bake pop tray or baking pan
  • candy melts and your favorite frostings
  • lollipop sticks
  • piping bag & tips
  • sprinkles, nonpareils, etc. (for decorating)
  • styrofoam board (for drying)

Bake cake mix in bake pop trays. Allow to cool. Remove pops from tray.

Place candy melts in narrow microwave-safe bowl and melt in microwave, per candy melt package directions.

Dip lollipop stick approximately 1/2″ into melted candy. Next, insert stick halfway into cake pop. Place pop on small baking sheet or plate. Repeat with remaining pops.

Place pops in freezer for 15 minutes to secure lollipop stick.

Place frosting in narrow microwave-safe bowl and microwave one minute. Tint if desired. Stir. Repeat until frosting is thinned enough for dipping. (Do not overheat or frosting may break down.)

Dip cake pops fully into melted frosting and allow excess to drip away.

Insert stick end of cake pops into styrofoam board to dry. Once the pops have dried, decorate as desired.

For more cake pop tips & methods check out Bakerella’s “how to” video.

-Joe

7 Comments

Filed under Cake, Chocolate, Cupcakes, Entertaining, Sweets

Autumn Apple Pie

Autumn is my absolute favorite time of year, although not for the reasons you might think. Sure there is the colorful splendor of the changing leaves, and that clean crisp fragrance in the air that says the holidays can’t be too far off. But what gets me most excited about the Fall is that it’s apple pickin’ season.

Lyman Orchards – Middlefield, CT

For me, there is something very romantic about journeying with family & friends to one of the many local orchards in New York and Connecticut.  It’s very special to spend a leisurely day together… picking apples, sipping cider, and meandering through corn mazes. All a much welcome departure from the fast-paced lives we’ve come to know.

When the day is done my mind will often wonder to memories of Autumns past, to Thanksgiving around the dinner table, and in particular to my sister’s homemade apple pie. Roseann is quite the natural baker, and on holidays, the dinner conversation will inevitably turn to guessing which of her fantastic desserts she may have prepared this time around. Of course I’m always hoping for my favorite—her wonderful apple pie. It just melts in your mouth, and is still, to this day, the best I’ve ever tasted.

Special thanks to Roseann for sharing, and for all her help in baking & shooting the pies for this post!

TIP:  If you’re like me, you believe that apple pie shouldn’t crunch when you take a bite, so use naturally soft apples like Macintosh or Cortland. It makes all the difference.

Autumn Apple Pie

Makes 8 to 10 servings

  • Pastry for 9″ double crust (use Pillsbury Pie Crust or make from scratch)
  • 8-10 medium cooking apples  (Macintosh or Cortland), peeled and sliced
  • 1 cup sugar
  • 2 1/2 tablespoons all-purpose flour
  • 2 teaspoons ground cinnamon
  • 1/4 teaspoon salt
  • 1 tablespoon butter or margarine
  • milk (for browning of crust)

• Preheat oven to 425F.

• Line 9″ pie pan with one pastry.  In large bowl stir together apples, sugar, flour, cinnamon and salt. Spoon into pastry-lined 9″ pie pan. Dot with butter. Cover with second pastry; fold overhang under; crimp and  flute edge.

• Brush pastry with milk;  cut a few slits for steam to escape.

• Bake 40-45 minutes until pie is browned and apples are tender. To prevent over-browning, cover pie loosely with tent of foil after 20 minutes.  Cool on wire rack or serve warm with vanilla ice cream.

Joe


9 Comments

Filed under apples, Dessert, Pie

Sweetest Witch Ever!

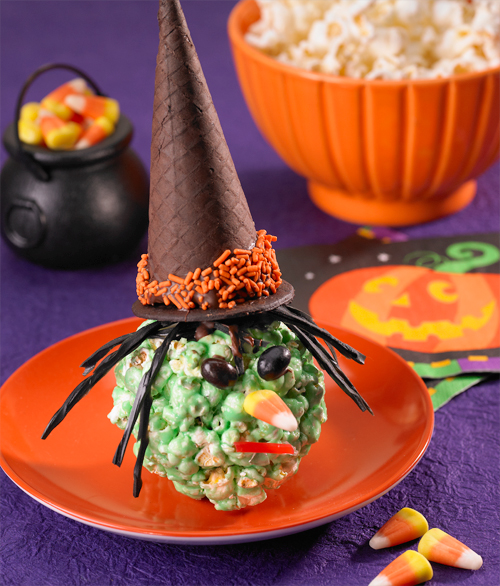
Looking for a spooky Halloween snack ? Check out this adorable witch that we recently  shot for The Popcorn Board. It’s easy to make & fun for kids —you just need grocery store ingredients and your imagination. Trick or Treat!

Here’s the recipe, courtesy of The Popcorn Board.

Witchy Popcorn Balls

Yield: 8

  • 16 chocolate wafer cookies
  • 3 quarts popped popcorn
  • 4 tablespoons (1/2 stick) butter or
  • margarine
  • 3 cups miniature marshmallows
  • 3 tablespoons (1/2 of a 3-ounce box)
  • lime gelatin dessert mix
  • Green food color, optional
  • 8 chocolate ice cream cones
  • 3/4 cup chocolate chips
  • Orange sugar sprinkles, placed in small bowl
  • Jelly beans, candy corn, licorice string
  1. Spread a sheet of wax (or parchment) paper over a work surface and place the wafer cookies on it.
  2. Spray a large mixing bowl with cooking spray and place popcorn inside.
  3. In a medium saucepan, melt butter over low heat. Stir in marshmallows and gelatin dessert powder until marshmallows are melted and mixture is smooth. If desired, adjust color with a drop or 2 of food color. Pour over popcorn and mix well until coated.
  4. Spray hands with cooking spray and press firmly to form into 8 balls. Place balls on 8 of the wafer cookies. Press candy decorations into popcorn balls to form eyes, nose and mouth.
  5. Place chocolate chips in a small microwave-safe bowl. Cover and heat for 10 seconds. Stir chocolate to aid melting. Repeat as needed until chocolate is melted and smooth.
  6. Spoon about 1/2 teaspoon melted chocolate onto the top of each popcorn ball. Press a few licorice strings into chocolate to form ‘hair’.
  7. Make hats: dip cone edges into melted chocolate and then into orange sugar sprinkles. Using melted chocolate as the “glue,” attach cones to remaining wafer cookies to form hat with brim. Place hats onto popcorn balls, again using melted chocolate as the “glue.” Allow chocolate to set for about 45 minutes before serving.
  8. Serve or seal individually in plastic wrap for storage.

3 Comments

Filed under Halloween, Holidays, Popcorn, Sweets

Cupcakes—those cute little cakes

Have you noticed? Cupcakes are all the rage.  So many flavors, so many frostings, so many toppings, and so many sizes!  Cupcakes have become a whimsical replacement for traditional desserts. I remember when they were just a simple treat to send to school for kids’ birthdays—now they pop up all over, even at wedding receptions!

For those in the Connecticut area, I have started a cupcake venture, Cupcakes for a Cause.  Part of the proceeds are donated to a local animal shelter.  Visit my website and see my limited holiday flavors!!  www.cupcakecause.com

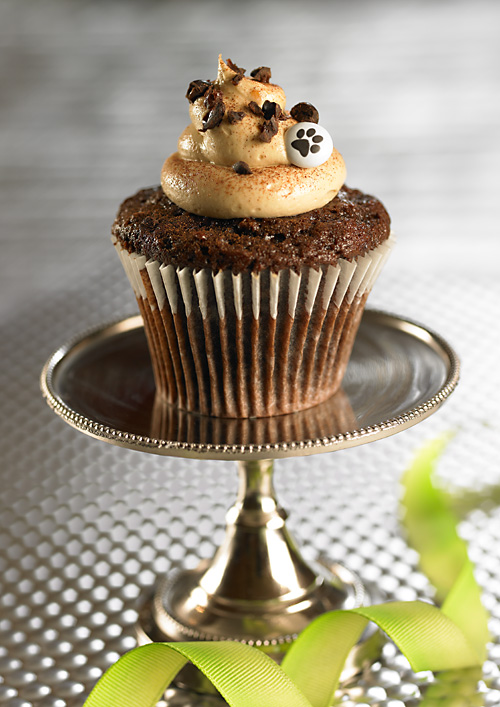
Showcased in the above photo is one of my offerings – Cup o’ Joe (developed in honor of my A LA CARTE partner, Joe, who makes the best coffee in town!)  It is a rich Espresso Cupcake topped with Mocha Buttercream, then sprinkled with chopped candied coffee beans & ground cinnamon.

Cathy

8 Comments

Filed under Cake, Chocolate, Cupcakes, Dessert, Sweets

Please Pass the Sangria!

Is there anything quite as refreshing as a cool glass of Sangria on a hot summer evening? Try this white wine version I recently concocted for a studio party. It’s delicious!

Sangria is not an exact science. Try experimenting on your own with various fruits and sweeteners….the combinations are endless. And let us know if you come up with your own signature Sangria!

Sparkling White Sangria
Makes 8 servings

1 bottle white wine (such as Chardonnay, Reisling, or Chablis)
1/2 cup superfine sugar
1/4 cup orange brandy (such as Cointreau or Grand Marnier)
2 plums, pitted and sliced
1 peach, pitted and sliced
1 mango, peeled and sliced
2 cans (12 ounces each) club soda or seltzer
fresh mint

• In large pitcher, stir together wine, sugar and brandy until sugar is dissolved. Add fruit. Cover and chill for at least an hour (the longer the better!)

• Just before serving, stir in club soda. Serve over ice with mint. Sip!

Cathy

4 Comments

Filed under Drinks, Entertaining, Foodies, Fruit, Holidays, Vegetarian

Wait. What? Watermelon!

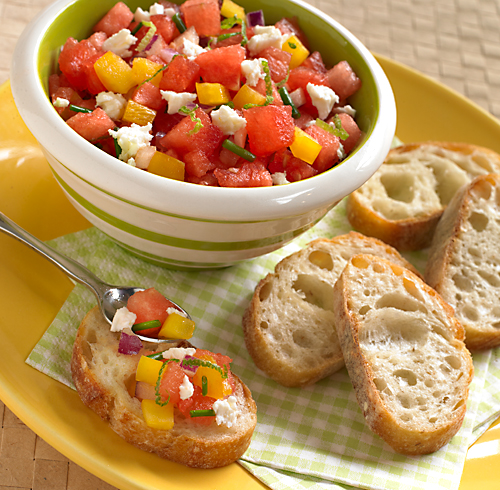
Take a close look at this picture. You’re right, that’s not chopped tomato; it’s fresh watermelon!

Last week Cathy was looking for a quick and easy summer appetizer that would take advantage of the season’s fresh produce. We think she scored a home run with this sweet ‘n tangy watermelon bruschetta. You’re gonna love it!

Watermelon Bruschetta

Makes about 2 1/2 cups

2 cups diced watermelon, drained on paper towel
1/3 cup diced yellow bell pepper
1/3 cup crumbled feta cheese
1 tablespoon diced red onion
1 teaspoon lime zest
2 tablespoons fresh lime juice
1 tablespoon snipped chives
1 tablespoon olive oil
1 baguette, thinly sliced

• Combine all ingredients except for the bread.

• Cover and chill at least 30 minutes. Serve with bread slices.

Tips

• Do not prepare more than an hour before serving or mixture will become too soft.

• Try the watermelon over grilled chicken or salmon. Yum!

3 Comments

Filed under Appetizer, Breads, Cheese, Entertaining, Foodies, Fruit, Snacks, Vegetarian

Guilt-free Chocolate Shake!

and now, a little quiz from A LA CARTE…..

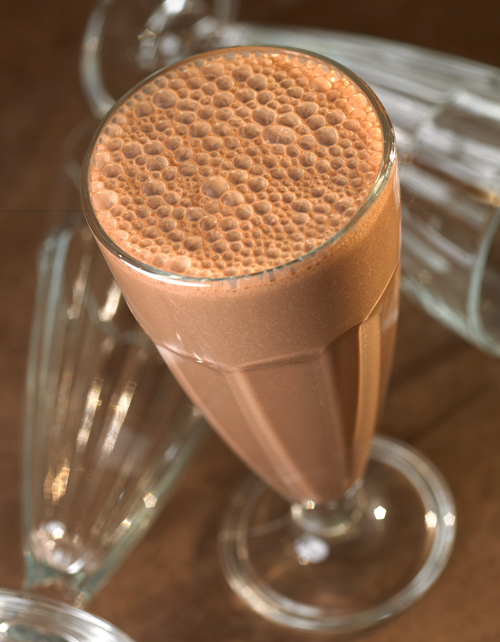
The mouth-watering chocolate milkshake in the photo:
A. is both non-dairy & cholesterol-free
B. is vegan
C. contains only 200 calories
D. tastes as good as it looks
E. All of the above

If you answered “E”, give yourself a star, and have a sip!

The secret to this tasty, healthful shake is Silk brand’s Dark Chocolate Almond Milk. It’s  available at large grocery stores and I even found it at my Target. Silk’s website has a store locator; just enter your zip code. If your store does not carry it, pester the manager to order it!  It’s quite tasty straight, but extra fab in shakes and dessert recipes. Try it!

Dark Chocolate & Banana Milkshake

1 cup (8 ounces) dark chocolate almond milk
1/2 banana
1/2 cup crushed ice

– Place all ingredients in blender. Blend until smooth.

– Serve immediately.

Heather

2 Comments

Filed under Chocolate, Drinks, Healthy, Shakes & Smoothies, Vegetarian

Classic Macaroni and Cheese

Here at A LA CARTE we are passionate about our Mac ‘n Cheese.

In fact, we have rules.

#1 Mac ’n Cheese must not be from a box. EVER.

#2 Mac ’n Cheese must be made with a quality aged cheddar.

#3 Mac ’n Cheese must not have unnecessary add-ins. No broccoli, no tuna, no bacon, no chicken, no lobster. No exceptions.

Classic Macaroni & Cheese
Makes about 8 servings

1 pkg. (16 oz.)  cavatappi pasta ( elbows, gemelli, or penne)
3 tablespoons butter or margarine
2 tablespoons all-purpose flour
1 teaspoon salt
1 teaspoon dry mustard
1/2 teaspoon coarse-ground black pepper
2 cups milk
8 ounces aged cheddar, shredded

– Preheat oven to 375°.

– Grease bottom and sides of 2-quart casserole.

– Cook pasta according to package directions. Drain and return to cooking pot.

– Meanwhile, in medium saucepan, melt butter over medium heat. Using whisk, stir in flour, dry mustard, salt and pepper. Cook and stir until well blended.

– Slowly add milk to flour mixture, whisking constantly. When sauce begins to thicken, remove from heat. Let mixture cool for about five minutes.

– Stir in cheese until melted.

– Pour cheese sauce over cooked pasta in pot. Mix well. Transfer to casserole.

– Bake uncovered at 375° for 30 minutes until bubbly and lightly browned.

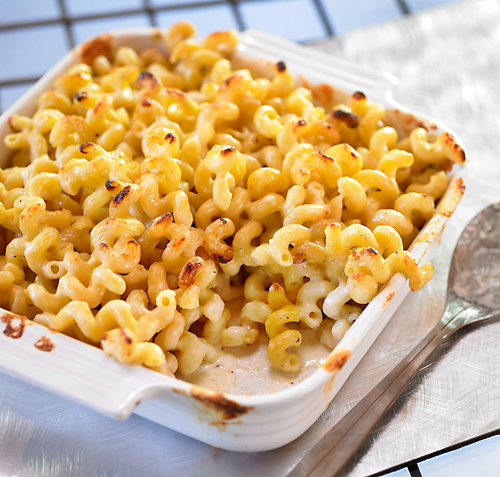
In the photo above, we’ve used cavatappi (corkscrew) pasta and a 3 year old extra-aged artisanal cheddar from Grafton Village Cheese Company, called Grafton Gold.

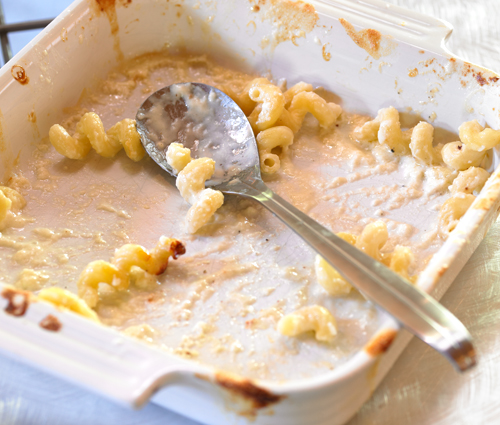
We’d offer to share, but it’s all gone!

6 Comments

Filed under Cheese, Main Dishes, Pasta, Side Dishes

Little, Luscious and Easy-as-Pie!

SO simple.

SO cute.

SO luscious!

During some food-styling downtime at a recent location shoot, Cathy concocted this elegant little tart. Of course, we thought it was beautiful, so we raced to put it on the set, and voilà!  Do you love it??

Cathy started with a small, good quality shortbread cookie for the base. She used LU, a readily available shortbread cookie with an adorable crimped edge. She topped the cookie with a tablespoon of prepared lemon curd, then garnished with a tiny dollop of whipped cream, a blueberry, and some lemon zest.

This is the perfect no-cook, no-bake recipe for those last-minute get-togethers when you’re short of time,  but still looking for a dessert with some “wow” power. Just keep the ingredients on hand, and you can be turning out tarts at a moment’s notice.

Here are some other sweet tarts to consider:

Chocolate Tart:  shortbread cookie, a tablespoon of prepared chocolate pudding, a dab of whipped cream, a raspberry, & chocolate shavings
Butterscotch Tart:  shortbread cookie, a tablespoon of prepared butterscotch pudding, a dab of whipped cream, & chopped toasted pecans
Key Lime Tart: shortbread cookie, a tablespoon of prepared lime curd, a dab of whipped cream, & lime zest

Heather

4 Comments

Filed under Cookies, Dessert, Entertaining, Lemon, Sweets

Easy Easter Cookies

Looking to channel your inner Martha and whip up some professional looking Easter cookies? It’s easy!

• Pick up a few cookie cutters at your local kitchen shop, or order from our favorite source, The Cookie Cutter Shop.

• Place one package refrigerated sugar cookie dough (such as Pillsbury) in a large mixing bowl. Mix in about 1/4 cup of flour to make a stiff dough. (The extra flour will help the cut-out cookies hold their shape while baking.) Now, just roll dough to 1/4-inch thick, cut out shapes, and bake according to package directions.

• To decorate, use your favorite frosting, icing or melted chocolate to cover cookie.  Royal icing is the best choice if you want a very smooth surface, and it colors beautifully. Royal icing typically uses raw egg whites.  To eliminate the risk of salmonella when using raw egg whites, meringue powder is recommended.

Royal Icing with Meringue Powder:  In large bowl, stir together  4 cups confectioners’ sugar and 3 tablespoons meringue powder.  Add 1/2 to 3/4 cup water and beat on high until a ribbon of icing falls back into the bowl and remains on the surface of the icing for a few seconds before disappearing.  This is the best consistency to cover or “flood” the entire surface of the cookie. Tint icing with a tiny bit of food color or paste. Place cookies on cooling rack over a cookie sheet, and “flood” by gently spooning the icing over them. If icing is not thin enough, add water, a teaspoon at a time, until it spreads easily.

Before cookie dries, sprinkle with your favorite sugars and sprinkles.  Check out Wilton Decorating for more creative decorating ideas & tips.

Note: You can purchase meringue powder at large party stores, kitchenware shops and some supermarkets.


7 Comments

Filed under Cookies, Dessert, Easter

Key Lime Cake

One word. Quite delicious. Okay, that’s two words, but this cake is quite delicious. Last night my doorbell rang and I signed for a small package. I opened it up to find a beautiful Key Lime Bundt Cake. It was from my sister who had ordered it

from a company called We Take the Cake. What a fun name!  The beautifully packaged cake came with a small container of Key Lime Glaze. I drizzled it over the top and cut a slice. Yum. What a tropical hit! A creamy key lime tang and a moist and tender texture. Sooo good. I could almost hear sound of steel drums—for a few moments I forgot it was still a wintry 40 degrees!

I had to learn more about We Take the Cake. Luckily the stylish brochure accompanying the box was filled with pictures and mouth-watering descriptions of the cakes they sell seven days a week via mail-order. Strawberry Cake, Coconut Cake, Red Velvet Cake, Carrot Spice Cake, Rum Cake, well the list goes on and on. Check them out!

Heather

2 Comments

Filed under Cake, Dessert, Reviews

No-Knead to Fuss !

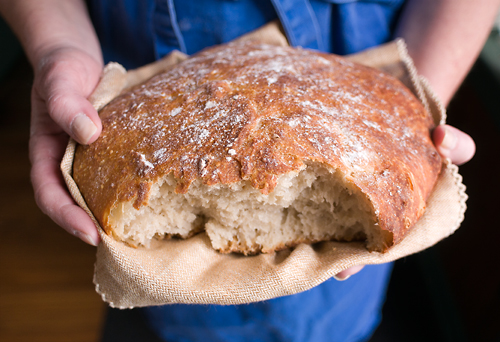
Perhaps nothing smells more inviting than the aroma of fresh bread baking in the oven. So when my wife’s long-time friend Virginia turned me on to a simple no-knead bread recipe recently, I just had to try it.

The original recipe is from Jim Lahey, of Sullivan Street Bakery in New York City. All it takes is flour, yeast, salt and water… what could be easier?  The recipe calls for baking the bread in a Dutch Oven, but don’t waste your money on expensive pots… I picked up a 6 qt. enameled cast iron Dutch Oven at Costco for only $39.

Well, we’ve gone through about a dozen loaves so far, and I’m scoring big points with family & friends . The kids love it toasted with butter, and I’m getting rave reviews on the exquisite crunchiness of the crust.

So why not start baking your own bread at home? You’ll be so impressed with the results, you may never buy another expensive artisanal loaf again. You can find the no-knead bread recipe, and view the New York Times video with Mark Bittman by clicking on the provided links.

-Joe

4 Comments

Filed under Breads

Saucy Mama’s Lime Chipotle Pulled Pork

Joe, Heather and I attended the Fancy Food Show recently and were tempted by all the tantalizing new flavors and products. Rubs, marinades, spice blends…FLAVOR was everywhere! A particular standout were the offerings from Saucy Mama, maker of marinades, dressings, sauces and mustards.  We sampled some of their popular items such as Lime Chipotle Marinade, Sesame Ginger Dressing, Cracked Pepper Marinade and Chipotle Mustard to name a few.  They were all chock full of zest, spice, and character.

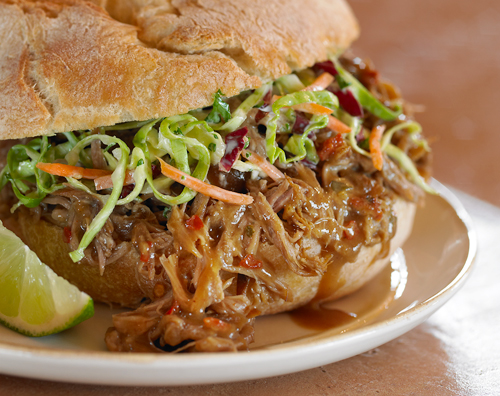
Saucy Mama’s motto is Make Every Meal Extraordinary, and  that is just what we decided to do.  We took Saucy Mama Lime Chipotle Marinade, combined it with pork, barbecue sauce and brown sugar, tossed it into the  slow-cooker and created a fantastic Pulled Pork recipe.  It is a little bit sweet, a little bit sour and a lot spicy hot!!!

Lime Chipotle Pulled Pork Sandwiches
Makes 8 Servings

3 1/2 lb. boneless pork shoulder roast or pork butt
1 medium onion, sliced
1 bottle (12 oz.) Saucy Mama Lime Chipotle Marinade
1/3 cup barbecue sauce
2 tablespoons brown sugar

Plus:
8  sandwich rolls, split
2 cups prepared cole slaw

– Place pork roast and onion in large slow-cooker.

– In small bowl, stir together Lime Chipotle Marinade, barbecue sauce, brown sugar and 1/3 cup water.  Pour over pork.  Cover and cook on LOW 8-10 hours.

– Remove pork from slow-cooker. Using a knife and fork, pull meat into shredded pieces.  Place shredded meat back into sauce in slow-cooker and stir. Keep warm until ready to serve.

– Divide pork mixture evenly between split rolls; top with cole slaw.

-Cathy

14 Comments

Filed under BBQ, Crock-Pot, Pork, Reviews, Sandwiches

Three Tasty Mice


Here’s the story behind these adorable little morsels!  I had dinner with my friends from PAWS (Pet Animal Welfare Society) last night. The conversation always turns to animals, and we all share our stories in one way or another.  At dessert time, my friend Alexis presented a tray of adorable edible mice.  They were actually quite simple in design: a chocolate-covered cherry (with stem) for the body and tail, a Hershey’s Hugs Kiss for the face, sliced almonds for the ears, and icing for the eyes and nose.  Serve them over a triangle of cheese… genius! Or should I say “Micey” Nice!

Cathy

24 Comments

Filed under Dessert, Entertaining, Snacks, Sweets

Valentine’s Tiramisu for Two

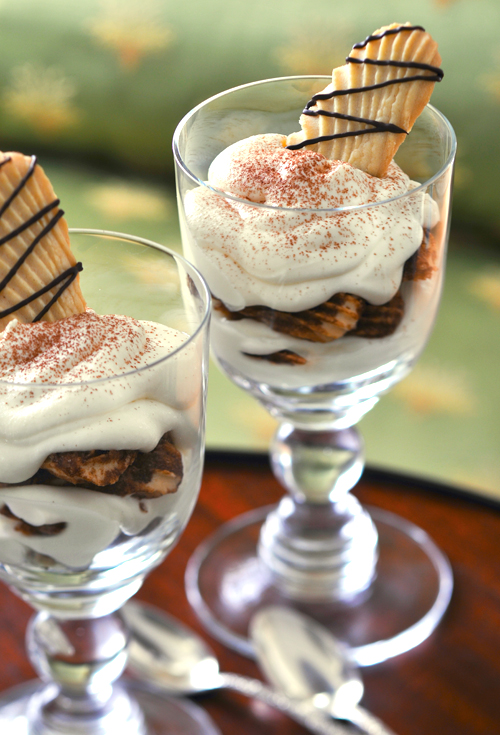
When planning a romantic Valentine’s Day dinner for two, dessert is a must!  An indulgent combination of mascarpone cheese, coffee liqueur, cocoa and ladyfingers, Tiramisu is perfect for special occasions. For an elegant presentation, I serve the Tiramisu in wine goblets. Ladyfingers (spongecake cookies) may be hard to find in grocery stores, so I substitute Walkers Shortbread Cookies. They  have a uniquely rich texture and a melt-in-your-mouth buttery flavor, plus they do not get as mushy as ladyfingers in a Tiramisu recipe. Look for Walkers’ signature red plaid packaging in the cookie aisle.

Tiramisu for Two

Makes 2 servings

2 tablespoons coffee flavored liqueur
1 tablespoon brewed coffee
8 shortbread cookies, such as Walkers Pure Butter Vanilla Shortbread
1/2 cup heavy cream
1/4 cup + 2 tablespoons sugar
1 container (8 oz.) mascarpone cheese
1 square (1 oz) semi sweet chocolate, chopped
1/2 teaspoon unsweetened cocoa powder

– In small bowl stir together coffee liqueur and coffee.  Brush both sides of  6 of the shortbread cookies with coffee mixture.  Cut each cookie in half.

– In medium bowl beat heavy cream and 2 tablespoons sugar until stiff peaks form.

– In separate medium bowl, beat mascarpone cheese and 1/4-cup sugar.  Fold in whipped cream.

–  In each of two wine goblets, place 3 cookie halves.  Spoon 1/4 of cheese mixture over cookies. Repeat layers.  Refrigerate at least 2 hours so that cookies soften slightly.

– Meanwhile, in small bowl, microwave chocolate on High 40 seconds, then stir until melted.  Using a small spoon, drizzle the melted chocolate over remaining 2 cookies.

– Just before serving, use a fine sieve to lightly sprinkle each dessert with cocoa.  Garnish each dessert with a chocolate-drizzled cookie.

Cathy

4 Comments

Filed under Dessert, Holidays, Sweets, Walker's Shortbread Fingers

Touchdown Treat for a Crowd

Gimme a F-E-S-T!   Football Fest.  Beer Fest.  Fan Fest.  Media Fest.  And  last but not least, MAJOR Calorie Fest! Yep, it’s Super Bowl time. For me, the Super Bowl is all about two things: the Doritos commercials and, of course, the snacks. However, I am so over the predictable calorie-heavy buffalo wings and the cheese-laden nachos. Yet, a vegetable platter just doesn’t seem like football fare. Hmmm, there must be some middle ground! This afternoon, I remembered that ALC shot a yummy recipe recently for the Popcorn Board that fits the occasion perfectly.

Touchdown Popcorn Peanut Treat
makes about 4 quarts

4 quarts popped popcorn
1 cup unsalted cocktail peanuts
1 cup seedless raisins
1 cup honey
1/2 cup water
1 tablespoon lemon juice

– Preheat oven to 300F.
– In a large buttered bowl, combine popcorn, peanuts and raisins.
– In small saucepan stir together honey, water and lemon juice; bring to a boil. Cook and stir over medium heat until mixture reaches 250 degrees Fahrenheit, or hard ball stage  on a candy thermometer.
– Pour over popcorn; quickly toss to mix thoroughly.
– Turn onto a buttered jelly roll or large baking pan.
– Bake for 20 minutes, stirring occasionally.

Tips

– Use freshly squeezed lemon juice for the best flavor.

– The cold water test is a sure bet when testing for the hard ball stage of a candy  mixture.  Drop a small amount  of the syrup into cold water. It will form a hard ball.  If you take the ball out of the water, it won’t flatten. The ball will be hard, but you can  still change its shape by squashing it.

– Add dried fruits such as cranberries, cherries, pineapple, blueberries, apricots to mix it up a bit.

Heather

3 Comments

Filed under Entertaining, Popcorn, Snacks

Slow-Cooker Butternut Squash Soup

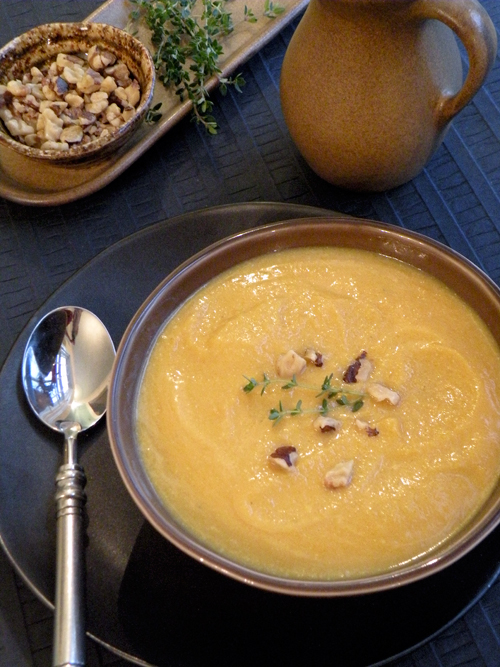
Wow, have I been making the most of my slow-cooker this season!  Here on the East Coast, we have been hammered with snow, and  there is nothing like coming into the kitchen after hours of shoveling or sledding to the aroma of a hearty soup or stew. My most recent concoction? A creamy and delicious Butternut Squash Soup.  I pre-roast the squash for about 15 minutes which really brings out its wonderful nutty taste.  Curry and coriander add layers of flavor to the soup and are balanced by a slightly sweet touch of applesauce.  Serve the soup in a huge mug and grab a warm, crusty chunk of bread and a cozy blanket.  My frostbitten toes are tingling just thinking about it!

Butternut Squash Soup

Makes about 10 cups

1 butternut squash, peeled and halved  (about 3 pounds)
1 tablespoon olive oil
1 tablespoon butter or margarine
1 onion, chopped
1/4 teaspoon curry powder
1 sweet potato, peeled and cut into 1-inch cubes
4 cups chicken broth
1/2 cup apple sauce
1/2 teaspoon salt
1/4 teaspoon ground nutmeg
1/4 teaspoon ground coriander
1/4 teaspoon cinnamon
1/4 teaspoon ground black pepper
1/2 cup heavy cream
1/2 cup chopped walnuts, lightly toasted
– Preheat oven to 400F.  Place butternut squash halves, cut side up, in roasting pan. Drizzle with olive oil.  Roast 15 minutes.  Cut into 1-inch cubes.
– In medium saucepan, melt butter.  Add onion and cook, stirring, until lightly browned.  Stir in curry powder; cook 1 minute.
– Place butternut squash and onion mixture into a large slow-cooker.  Add remaining ingredients except heavy cream and walnuts.  Cover and cook on LOW for 7 hours.
– In food processor or blender, process mixture in small batches until purèed.  Return to slow-cooker on WARM setting; add heavy cream and stir  until heated through.
– Sprinkle each serving with chopped walnuts and a sprig of fresh thyme if desired.


4 Comments

Filed under Butternut Squash, Crock-Pot, curry powder, Entertaining, Soup

Cheesecake Convert

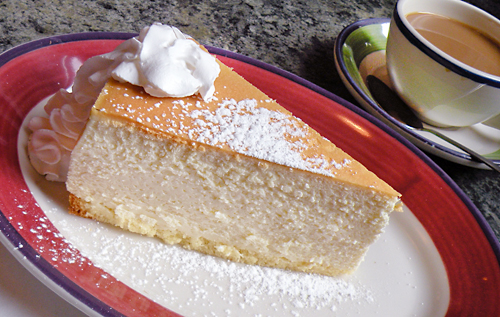
I’ve never really been a cheesecake person. But I am now. While in New York City a few weeks ago, I stopped in at Lindy’s, a diner/deli just north of Times Square. Lindy’s gets few points for atmosphere or value (it’s horribly overpriced), but it’s world-famous for its cheesecake. So, I figured, when in Lindy’s, order the cheesecake. Was I glad I did! The cheesecake was quite simply the best I’ve ever tasted. Light, yet dense. Fluffy, yet creamy. Not too sweet, with just a hint of lemon. A tender cookie crust. And a garnish of canned whipped cream which should have been all wrong, but was somehow just right.

Not exactly a healthy snack, but a generous slice and a cup of surprisingly good coffee kept me going for the rest of the day.

I googled “recipe for Lindy’s cheesecake”  and 28,600 results came up! I must get started. Now, where did I put that springform pan…

Heather

1 Comment

Filed under Cake, Dessert, Reviews, Sweets

Christmas Cupcakes Made Easy!

These Red Velvet Cupcakes with Cream Cheese Frosting & Holiday Sprinkles are made from Duncan Hines Red Velvet Cake Mix and Vanilla Cream Cheese Frosting. I added 3 tablespoons Hershey’s unsweetened cocoa powder to the cake batter for added chocolate flavor. The cupcakes taste great, but also look great thanks to the beautiful cupcake liners.

As a props stylist, I am sometimes stopped dead in my tracks when I discover a new product that I could only have dreamed of in years past. While other people may be excited by, say, advances in technology or medical science, I get excited when I see products perfect for photo shoot propping, and I am always on the lookout. Colorful straws that bend, square plates, tiny glass Christmas balls in unusual colors…well, you get the idea.

Cupcakes have always been hard to shoot because the see-thru thin paper liners were so unattractive that they ruined the shot. The foil liners were a bit better, but not by much. (Seriously, I have been known to handpaint cupcake liners because what we needed for a shoot simply did not exist.) For many years, cupcakes were pretty, cupcake liners were not. It was common knowledge. At least in my world.

Therefore, I was recently blown away when I came across Reynolds’ line of decorative foil cupcake liners that change seasonally. The red and green ribbon swirl pattern practically jumped off the shelf as I browsed the baking aisle of my grocery store. The liners are paper on the outside and foil on the inside. They hold their color and their shape; in fact, you do not even need a cupcake tin to use them. Pretty & practical…now that’s genius.

Happy cupcaking!

Heather

3 Comments

Filed under Chocolate, Cupcakes, Dessert, Entertaining, Holidays

Christmas Morning Muffins

Ah, a warm muffin and a hot cup of coffee.  That’s a near perfect winter breakfast!

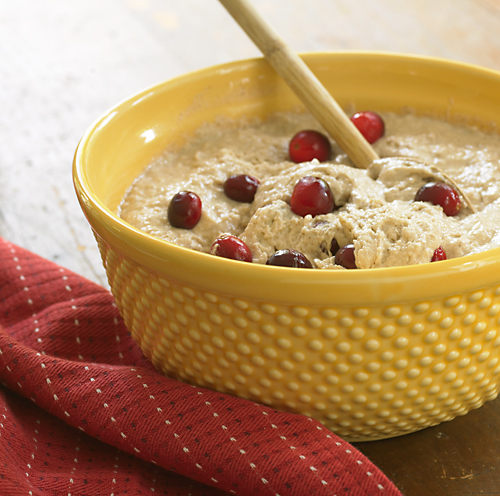
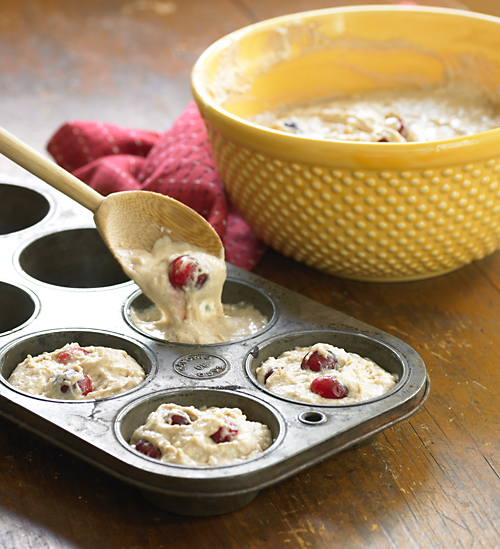
We think you’ll love these Cranberry-Orange Streusel Muffins. The sweetness from the drizzled icing nicely balances the tartness of the fresh cranberries and the orange flavor comes shining through. The beautiful red of the cranberries makes these muffins especially pretty for Christmas morning.

Cranberry-Orange Streusel Muffins

(makes 8 muffins)

Streusel Topping:

3 tablespoons all-purpose flour
2 tablespoons packed light brown sugar
1/4 teaspoon ground cinnamon
2 tablespoons softened butter or margarine

Muffins:

1 3/4 cups all-purpose flour
1/3 cup sugar
1 1/2 teaspoons baking powder
1/4 teaspoon baking soda
1/4 teaspoon ground cinnamon
1/4 teaspoon salt
1 egg
2/3 cup  milk
1/3 cup vegetable oil
1 teaspoon grated orange peel
1 cup cranberries (whole or coarsely chopped)

Icing:

1/3 cup confectioners’ sugar
2 1/2 teaspoons orange juice

– Preheat oven to 350°F.  Grease 8 muffin pan cups.

– Prepare streusel topping:  In small bowl, stir together flour, brown sugar and cinnamon.
Add butter, stirring, until coarse crumbs are formed. Reserve.

– Prepare muffins:  In large  bowl, stir together flour, sugar, baking powder,  baking soda, cinnamon and salt.  In small bowl, using wire whisk, lightly beat egg, milk, oil and orange peel.  Stir into flour mixture just until combined.  Stir in cranberries.

– Divide batter among prepared muffin cups.  Sprinkle reserved streusel topping evenly over muffins. Bake 20 minutes or until toothpick inserted in center comes out clean. Remove from muffin cups.

– Meanwhile, prepare icing:  In small bowl stir together confectioners’ sugar and orange juice.
Drizzle over warm muffins. Garnish muffins with extra grated orange peel if desired.


14 Comments

Filed under Berries, Breads, Breakfast, cranberries, Holidays

25 Easy Holiday Appetizers

Need a quick holiday appetizer recipe?  We’ve compiled a list of easy, no-recipe-required appetizers that combine a little of this and a little of that to give you an arsenal of hors d’oeuvres that you can serve now and all through the year.  Print the list so it will be at your fingertips. You’ll be ready for anything!

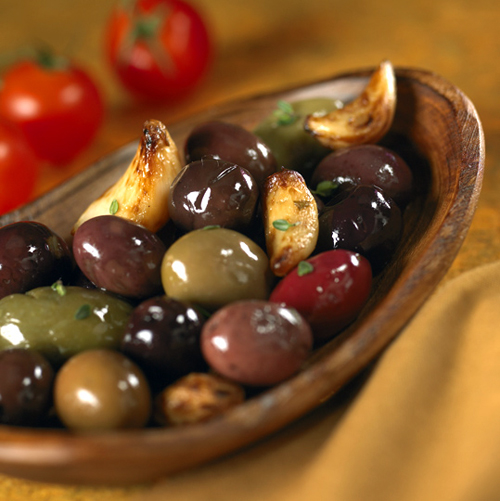
mixed olives, roasted garlic & fresh rosemary (#16.)

1.  Spoon cranberry chutney over a block of cream cheese; sprinkle with chopped pistachio nuts.  Serve with crackers.

2. Wrap a cracked-pepper bread stick or lightly steamed asparagus spear with prosciutto.

3. Pipe your favorite hummus onto cucumber slices and sprinkle with chopped toasted nuts.

4. Pipe flavored cream cheese onto quartered pumpernickel bread slices or party rye slices; drizzle with warmed fig preserves.

5. Toss 2 cups of your favorite nuts with one beaten egg white; sprinkle with 2 tablespoons sugar and your favorite spice blend. Spread on baking sheet and bake 300°F for 25 minutes.

6. Spoon finely chopped pears tossed with small amount of chutney onto ends of endive leaves.  Sprinkle with gorgonzola cheese.

7. Cut your favorite store-bought pizza into bite-size pieces.

8. Brown sliced, fully cooked kielbasa in butter with a sprinkling of brown sugar; add drained, canned pineapple chunks.  Serve warm with toothpicks.

9. Toss mozzarella balls (bocconcini) and grape tomatoes with your favorite balsamic vinaigrette. Serve with toothpicks.

10. Stir chopped sun-dried tomatoes and a small amount of basil pesto into neufchatel cheese.  Serve with toasted bread slices.

11. Heat store-bought breaded chicken tenders. Serve with a dipping sauce made from warm apricot preserves combined with a dash or two of chili powder and a splash of BBQ sauce.

12. Sprinkle cooked baby back ribs with toasted sesame seeds; cut into individual ribs and serve with duck sauce.

13. Spread a large flour tortilla with store-bought salmon spread; sprinkle with capers and minced red onion; roll up, then cut crosswise into 3/4 inch slices to make spirals.

14. Stir chopped mango into your favorite salsa.  Serve with tortilla chips.

15. Split dried apricots. Fill each with a small piece of brie and drizzle with raspberry preserves.

16. Toss store-bought mixed olives with roasted garlic cloves, fresh rosemary sprigs, sea salt and red pepper flakes; heat, covered with foil, until warm. Serve with toothpicks.

17. Serve cooked, peeled shrimp with chipolte mayonnaise mixed with a splash of BBQ sauce and a spoonful of honey mustard.

18. Cut steamed tiny red or fingerling potatoes in half; top with a dab of sour cream, and sprinkle with finely chopped cooked bacon, minced chives, sea salt and cracked pepper.

19. Top a warmed brie wheel with a warm mixture of canned apple pie filling and a dash of balsamic vinegar; sprinkle with toasted pecans.

20. Spoon your favorite warmed chili into Tostitos Scoops; sprinkle with shredded Cheddar cheese and minced scallions.

21. On toothpick, thread a chunk of Black Forest Ham and a small cornichon. Serve with whole grain mustard for dipping.

22. Cook  frozen cocktail meatballs. Serve  with store-bought tzatziki sauce.

23. Toss chopped dried cherries and chopped pistachio nuts with enough honey to bind mixture.  Spoon over goat cheese log.  Serve with crackers.

24. Top a cucumber slice with a thin smoked salmon slice;  add a dab of sour cream, capers, and minced chives.

25. LAST BUT NOT LEAST!!!  Lightly brush frozen soft pretzels with water.  Sprinkle with your favorite seasoning.  Bake and cut into serving pieces.  Serve with mustard, or, if seasoning topping is sweet, caramel or chocolate sauce.

Cathy

5 Comments

Filed under Appetizer, Entertaining, Holidays

Dangerously Good Chocolate Mint Meltaways

It’s true….these Chocolate Mint Meltaways should come with a warning. They’re that good!

Have you ever noticed that the best looking cookies are not always the best tasting cookies? This is especially true when it comes to Christmas cookies. That adorably decorated sugar cookie might look like it should be on the cover of a fancy food magazine, but it can be dry as dust with little flavor save the traces of food colorings used to tint the frosting. No thanks!

So, when I discover a pretty cookie or bar that actually has awesome flavor and texture, it makes the “A” list and goes into my recipe file to make every year. I wheedled this recipe out of my friend Janet, and she said I could share it with all of you. But don’t say you weren’t warned. They truly are addictive!

Chocolate Mint Meltaways
(makes about 6 dozen bars)

Brownie Layer:
1/2 cup butter, softened
1 cup sugar
4 eggs, beaten
1 can (16 ounces) Hershey’s chocolate syrup
1 tsp. vanilla
1/2 tsp. salt
1 cup flour

• Preheat oven to 350°F. Line 13 x 9 baking dish with aluminum foil. Grease foil with a little butter.
• Using mixer, cream butter and sugar in large bowl. Gradually beat in eggs, chocolate syrup, vanilla and salt. Using wooden spoon, stir in flour until just combined.
• Spread mixture in pan and bake 30 minutes. Cool completely.
• Grasping foil, carefully lift brownie layer from pan and invert onto large cutting board. Peel away foil.

Mint Layer:
1/2 cup butter, softened
2 cups confectioners sugar
1 TB  Creme de Menthe liqueur
• Using mixer, cream butter and sugar, then beat in Creme de Menthe.
• Reserve 2 TB mixture, cover and set aside. Spread remaining mixture evenly over cooled brownie layer.

Chocolate Topping:
6 ounces semisweet chocolate chips
6 TB butter

• In heavy saucepan, stir chocolate and butter over low heat until melted. Cool.
• Gently spread chocolate topping over mint layer. Chill until chocolate is set.
• Using large knife and wiping blade frequently, cut into bars about 1 inch by 1 1/2 inches.

Mint Drizzle
Place reserved mint filling in small Ziploc bag and snip a tiny piece from the corner. Drizzle filling over each bar.

Note: Store bars covered, in refrigerator, for best results.

Heather

8 Comments

Filed under Chocolate, Cookies, Dessert, Entertaining, Holidays, Sweets

Classic Holiday Eggnog

Every holiday season, the same question comes up: Do the eggs need to be cooked in an eggnog recipe?

My answer is…definitely! Even refrigerated eggs with clean, uncracked shells can still be contaminated with the Salmonella bacteria, and  eggs must be cooked to 160°F to kill such bacteria.  There is a popular misconception that adding alcohol to eggnog will kill the bacteria.  Not so!

Here is an easy-to-follow, delicious cooked eggnog recipe.  You’ll have one less thing to worry about during your holiday season!

Classic Holiday Eggnog
Makes about 10 servings

4 eggs
1/3 cup + 1 Tbs. sugar
1/4 tsp. salt
3 cups milk
1 1/2 tsp. vanilla extract
1 cup heavy cream
1/2 cup bourbon or rum
ground nutmeg
cinnamon sticks for garnish

– In medium saucepan with wire whisk, gently beat eggs, 1/3 cup sugar and salt.  Gradually stir in milk.  Cook over low heat, stirring constantly, until mixture coats the back of a metal spoon.  Remove from heat; stir in vanilla.  Cover and refrigerate until well chilled.

– In large bowl, beat heavy cream and 1 Tbs. sugar until stiff peaks form.  Fold into chilled custard, then stir in bourbon.  Pour into large serving bowl or pitcher.  Sprinkle with ground nutmeg.  Serve with cinnamon sticks.

Tips

– When making the custard, be sure to cook over low heat, stirring constantly.  Trying to speed it along by increasing the temperature will most likely curdle the custard.

– For an even richer eggnog, substitute half-and-half or light cream for some of the milk.

– For a non-alcoholic eggnog, substitute 1/4 tsp. rum extract for the bourbon.

– Recipe can be doubled.

8 Comments

Filed under Drinks, eggs, Entertaining, Holidays

Thyme-Scented Roasted Vegetables

Why didn’t anyone serve vegetables like this when I was a kid?? They not only look beautiful with their glossy jewel tones and crispy caramelized edges, but they have amazing flavor. Mmmm…crunchy, slightly salty, accented with the sweetness of fresh thyme. Best of all, the roasting process could not be easier! Try these as a side dish to a holiday ham or turkey, or just them shine alone as a vegetarian course. Make sure you save the leftovers—just warm them up and arrange them atop fresh greens for a healthy and delicious salad.

Thyme-Scented Roasted Vegetables
Makes about 8 servings

6 cups assorted fresh vegetables (such as brussels sprouts, beets, carrots, parsnips, sweet potatoes, and onion)
3 tablespoons olive oil
1 tablespoon fresh thyme leaves
1 teaspoon sea salt
Fresh ground pepper, to taste

• Preheat oven to 450°F.
• Rinse and lightly scrub vegetables. Dry thoroughly. Pare vegetables if necessary. Cut all vegetables into uniform pieces, about 1 inch each.
• In large bowl, toss vegetables with olive oil, thyme, salt and pepper.
• Grease the bottom of a shallow roasting pan (not glass) or jelly-roll pan. Spread the vegetables in the pan in a single layer. Do not crowd the vegetables.
• Roast vegetables, stirring every ten minutes, about 30 minutes or until tender and lightly browned.

Heather

7 Comments

Filed under Entertaining, Side Dishes, Vegetables

Pumpkin Turkey Centerpiece

Searching for a creative centerpiece or whimsical hostess gift for Thanksgiving? Meet Tom Turkey.

Although I am not what you would call a crafty person, I made Tom in less than 5 minutes! Seriously, I did.

Handcrafted by artisan Jeff Krause, the handpainted metal head, feathers and feet of this turkey are easily poked in to your own pumpkin or gourd, and voilà!  I found one of Jeff’s kits in a local gift shop for $19.95, but I googled and the kit can be ordered for $15 plus shipping from The Rusty Crow. Each kit comes with 5 feathers, 2 feet and a head.

I actually bought my kit to mail to my sister as a gift, but I liked it so much I kept it. That’ll just be our little secret…

Heather

3 Comments

Filed under Entertaining

Sweet Indulgences

Oh, what a whirl! Or should I say swirl? Swirls do come to mind when I think of  “Sweet Indulgences”, a new dessert shoppe in Dumont, New Jersey. The shoppe’s owners, Gwynn Galvin and Bryan Mueller, are a mother/son team

Peanut Butter Perfection

who have combined their talents to create amazing treats with an innovative twist. Cheesecakes and cheesecake cupcakes in a variety of whimsical flavors—Cup o’ Cappuccino, Brownie Delight, & Apple Cinnamon Sensation—are their specialty.  To give you an idea of how wonderful they are, the Brownie Delight features a dark chocolate crust with luscious brownie bits baked into the batter with a topping of brownie chunks, fudge and a white chocolate drizzle. Need I say more?!

Other desserts include cupcakes in fun flavors such as Bubble Gum and Cotton Candy, as well traditional favorites such as Red Velvet (pictured below). The shoppe also offers an Indulgence of the Week, and proceeds from its sales are donated to charity. Now that’s a guilt-free dessert!

Gwynn has an extensive culinary background and is currently test kitchen director for Woman’s World Magazine. Bryan has a marketing and PR background specializing in food accounts. As a food stylist, I have worked with Gwynn for many years and I can say first-hand (or should I say first bite) that this team’s “sweet indulgences” are not to be missed!

If you are in the NY/NJ area, you can visit Gwynn and Bryan’s shoppe at 120B West Shore Ave. in Dumont, New Jersey (201) 384-CAKE. You may also visit them on the web at SweetIndulgencesNJ.com or become a fan of Sweet Indulgences on their Facebook page at http://www.facebook/SweetindulgencesNJ.

Cathy

8 Comments

Filed under Cake, Cupcakes, Dessert, Reviews

Billy Jabour’s Breakfast in Bread

This past summer I visited dear friends of mine, Dorie and Ray, in the Albany, N.Y. area.  As soon as I entered their house, I encountered the fragrant aroma of fresh-baked bread.  Moments later, Dorie presented an array of absolutely delicious stuffed breads that she had sliced into appetizer portions. I had to know the source, and luckily Dorie gladly shared her secret. The fresh-baked breads had just been delivered by Billy Jabour, a friend of Dorie’s daughter.

Billy Jabour is founder and owner of The Whole Loaf in Troy, N.Y.  Experienced bread baker and creator of signature stuffed-bread loaves, Billy started his business about 5 years ago.  The loaves were a Jabour family tradition as far back as Billy can remember. Initially, Billy started with a menu of 10 loaves, and today The Whole Loaf’s menu boasts more than 30 mouth-watering choices including savory and sweet combinations perfect for anytime of day.

The Breakfast in Bread loaf is an inspiration—bacon, breakfast sausage, ham, maple syrup, mozzarella and Swiss cheeses make up this awesome creation. We think it would be perfect for brunch…just add a colorful fruit medley, juice and coffee!

We couldn’t resist photographing some of Billy’s other flavors, too. You can only imagine how good it smelled in the studio!

The Beefcake (lower right: bacon, ground beef, onions, Cheddar and Pepper Jack cheeses); The Big Red (upper right: chicken parmesan, mozzarella and Parmesan cheeses); The Hamtastic (left: ham and Swiss cheese rolled in rye dough).

View the full menu by visiting wholeloaf.com.  You may order through the website, or email your request to orders@wholeloaf.com

Cathy

7 Comments

Filed under Appetizer, Breads, Breakfast, Cheese, Reviews

Milk & Cookies = Cookies & Milk

Hey fellow foodies, wanna play a fun food game? Try A LA CARTE’s Classic Food Pairings Test! Here’s how it works.

Step. 1: Think of a classic food pairing and say it aloud. (i.e., “Spaghetti & Meatballs“) Does it sound delicious? Proceed to Step 2.

Step 2: Transpose the food pairing and say that aloud.  (i.e., “Meatballs & Spaghetti“) Does it still sound delicious, or is it a bit awkward? If it’s still delicious, add it to your list of winners. If it’s awkward, try another combination.

You’ll soon find that this is a rigorous test and that very few food pairings make the list of winners.

When I played this game, Milk & Cookies was my first clear winner. It immediately reminded me of a shot our A LA CARTE team took of chocolate chip cookies and milk. This shot may look familiar to you since it’s the icon we use

in our Comments section. I love the shot because the cookies look warm and melty from the oven, plus the tall glass of milk looks cool and inviting—perfect for dunking. Cathy added toasted chopped pecans and extra chips to the cookie dough just before baking, and the way they catch the late-afternoon sunlight brings back happy memories of years of after-school snacking.

Other pairs on my list of winners? Red Wine & Chocolate. Bacon & Eggs.  Tea & Toast. Tomato & Basil. I could play this game all day…

Please send us your own winning food pairs, and we’ll comprise a master list to feature in an upcoming post. Happy pairing!

Heather

14 Comments

Filed under Chocolate, Cookies, Dessert, Snacks, Sweets

Pick a Pepper, Any Pepper

I recently came across this artful display of jewel-like bell peppers at a fruit and veggie stand. I love the colors! I immediately started to think about inventing a new recipe for A LA CARTE Kitchen. There are a variety of ways to use bell peppers—you can roast, saute, grill, or blanch them, use them in salads, or eat them raw. After lots of ideas, I settled on creating a modern version of traditional stuffed peppers.  I have happy childhood memories of my Mom serving green

peppers stuffed with ground beef, rice and tomato sauce.  I am sure many of you have the same memories!  I put a spin on the traditional recipe by using red, yellow and orange bell peppers, flavored chicken sausage, butternut squash, fresh sage, yellow rice and blue saga  cheese.  I think the flavor combination is delicious, and really nice for autumn—let me know if you like it!

Twisted Stuffed Peppers

Makes 4 servings

4 red, yellow and/or orange peppers, halved and seeded
2 tablespoons olive oil
3 flavored chicken sausage links, removed from casings  (about 1/2 lb. — I used sun-dried tomato and basil flavor)
1 cup diced butternut squash (about 1/2 small peeled and seeded)
1 small onion, chopped
1 garlic clove, minced
5 fresh sage leaves, chopped
1 package (8 ounces) yellow rice mix (I used Zataran’s, but you can use your favorite)
2 ounces Blue Saga cheese, cut into 8 slices

Parboil peppers until slightly tender, about 15 minutes. Drain.

– Preheat oven to 375F.  In large skillet, heat oil over medium heat.  Add sausage, breaking up meat with side of spoon, until browned.  With slotted spoon, remove sausage from skillet.

– To drippings in skillet, add  squash, onion, garlic and sage; cook, stirring, until lightly browned. Add rice mix, reserved sausage  and amount of water on rice package directions; heat to boiling.  Reduce heat, cover and simmer until rice is tender, following rice package directions.

– Arrange pepper halves, cut side up, in 13 x 9″ baking dish.  Spoon rice mixture evenly into pepper halves.  Top with cheese slices.  Bake, uncovered, until heated through and cheese is melted, about 15 minutes.

Tips

– Add raisins or currants to mixture to add a bit of sweet to mixture.

– Not a blue cheese fan like me? Try shredded cheddar, Monterey Jack, or mozzarella.

Peppers 101

Peppers come in all shapes, sizes and colors—large, small, red, green, yellow, orange, purple, oval, curled, bell-shaped and more.  They can be hot, mild, or sweet and have all sorts of names:  bell, chili, jalapeno, banana, habanero, cayenne, chipotle, cherry, fresno, mirasol, pablano, ancho, scotch bonnet, and serrano.

The most common is the bell pepper. They are the sweetest of all the varieties with green being the less sweet and slightly more bitter than the red, yellow and orange bell pepper. Red bell peppers also have more vitamins and nutrients and have twice the vitamin C content of green peppers.

Cathy


Leave a comment

Filed under Main Dishes, Sausage

Caramel Macchiato Popcorn Balls

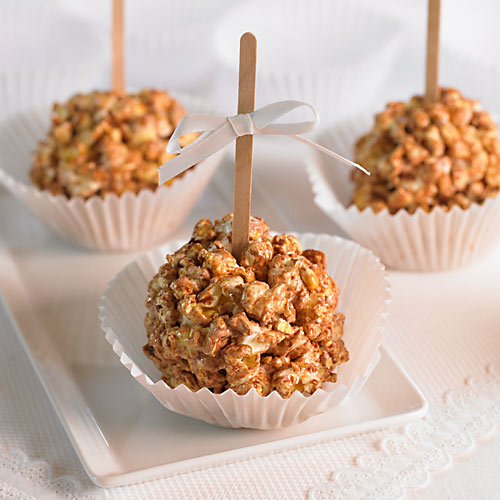
Why shouldn’t adults enjoy the whimsical play of a dessert on a stick?  Here’s a popcorn ball that’s not just for kids!

Traditional popcorn balls are usually loaded with gooey sweetness, but I’ve created a contemporary version with more grown-up appeal.  These coffeehouse-inspired popcorn balls are made with caramel, chocolate and espresso powder—what a combination!

Did you know that macchiato means marked or stained?  In this case, the popcorn is “marked” with a little espresso.  You have to try them—I’ve already eaten 3.  Okay, maybe 4!!!!

as photographed by our team, alacartepartners

Caramel Macchiato Popcorn Balls
Makes 6 popcorn balls

8 cups popped popcorn
1 tablespoon instant espresso powder
1 tablespoon warm water
20 caramels, unwrapped
1/3 cup semi-sweet chocolate chips
6 popsicle or craft sticks

– Place popcorn in large bowl. In small bowl, stir together espresso powder and warm water.

– In medium glass bowl, microwave caramels, chocolate chips and espresso mixture on HIGH (100%) power, 1 and 1/2 minutes. Stir
mixture until completely melted.
– Pour caramel mixture over popcorn and quickly stir until popcorn is well coated.  Using greased  hands, shape mixture into 6 balls.
Insert a stick into each ball.

– Store in airtight container up to 1 week.

Tips

– You can use store-bought popcorn; air popped popcorn or your favorite microwave popcorn.

– For a sweeter treat, use kettle corn.

– Instead of forming the popcorn mixture into balls, spread it in single layer on a baking sheet.  Let sit for 30 minutes and break into clusters.

– For added coffeehouse flavor, stir 1/4 teaspoon ground cinnamon into the espresso mixture.

Cathy

10 Comments

Filed under Caramels, Chocolate, Dessert, Popcorn, Snacks

Fig-mania

Okay, is it just me, or is there a fig craze afoot? From fig vinegars and fig chutneys to fig spreads and fig jams, I seem to be encountering figs everywhere I turn. Just yesterday I noticed pint baskets of fresh figs at my local supermarket. And last month, while driving to the beach in North Carolina, I stopped at Morris Farm Market and what was the first thing I spotted?  A gorgeous display of fresh figs!

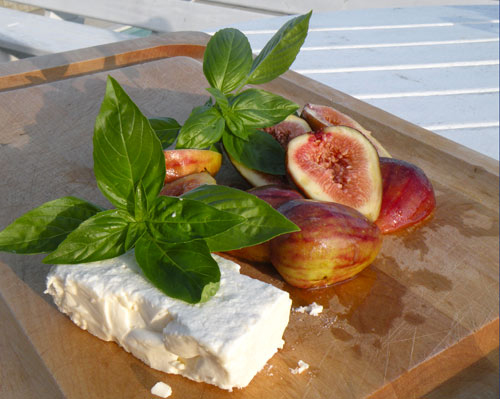
I bought a quart and we enjoyed experimenting with them over the next few days…we tried them grilled on pizza, drizzled with olive oil and added to arugula salad, and we even invented a bittersweet chocolate & fig dessert sauce that we poured over vanilla ice cream. Today, I was walking along Canal Street in Chinatown and there among the dried lychees and live crabs were, yes, pints of fresh figs, at the very reasonable price of two for $3!

So, in the spirit of fig-mania, we present Cathy’s latest fig concoction. And if you have a favorite fig recipe, please share it!

Heather

Tortelloni with Sautéed Figs & Goat Cheese
makes 2 main dish servings or 4 appetizer servings

3 Tbs. butter
1 medium onion, thinly sliced
6 figs, quartered (I used Kadota figs)
2 Tbs. chopped walnuts
1/2 tsp. salt
1/8 tsp. coarse ground black pepper
1 pkg. (9 oz) fresh portabello mushroom and cheese tortelloni (or your favorite
tortelloni or tortellini)
3 oz. goat cheese, crumbled
1/4 cup fresh basil leaves, thinly sliced

– In large skillet, heat butter over medium heat until lightly browned.  Add onions; cook and stir until browned.  Remove onions from skillet.  To skillet, add figs, walnuts, salt and pepper; cook until figs just start to soften. Remove skillet from heat.

-Meanwhile, cook tortelloni according to package directions, draining and reserving 2 Tbs. pasta water.

– To skillet, add tortelloni, reserved pasta water, cooked onions, goat cheese and basil; cook over low heat just until cheese melts.  Serve immediately.

FUN FIG FACTS

The most common figs grown in the United States come from California, and are generally available from mid-May thru mid-December. The four common varieties include:

Mission: deep purple skin (darkens to a rich black when dried) with pink flesh; sweet
Kadota:  green skinned with amber flesh; practically seedless; slightly sweet
Calimyrna:  golden skin with pink flesh; nutty flavor
Brown Turkey:  brownish copper skin with pink/red flesh; mildly sweet

Use fresh figs within a day or so after buying them as they are very fragile!

1 Comment

Filed under Cheese, Fruit, Main Dishes, Pasta

End-of-Summer Salmon

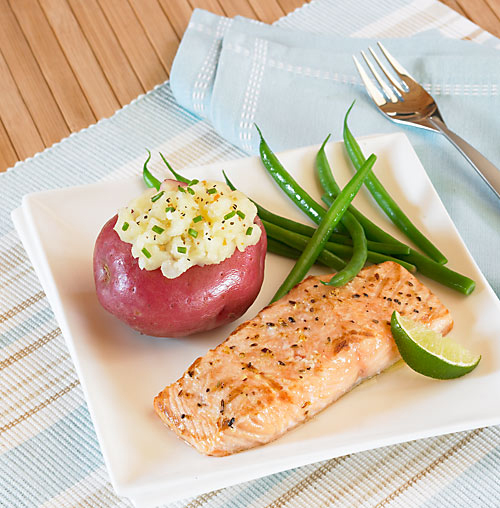
Summer is coming to a close, and what better way to say good-bye than with a delicious grilled salmon dinner? As a food stylist, I think of salmon as a “pretty” fish. Its rich orange color is a beauty! While you can slather salmon with a marinade, I prefer a simple dry rub. There are so many really interesting

as photographed by our team à la Carte Partners

flavorful rubs on the market.  In the recipe and photo above, I’ve used Bone Suckin’ Sauce Seasoning and Rub.  It is a blend of brown sugar, paprika, garlic and spices. McCormicks also has a great line of products called Grill Mates—Seafood Rub, Applewood Rub, and Sweet & Smoky Rub to name a few.  You can also make up your own rub with seasonings that fit your tastes. Experiment… it’s what makes cooking fun!!

Grilled Salmon

Makes 4 servings

4   salmon filets (6-oz. or 3/4-inch thick)
1-2 tablespoons Bone Suckin’ Sauce Seasoning and Rub

– Prepare grill & grease lightly
– With tweezers, remove any small bones from salmon steaks.
– With hands, rub seasoning over both sides of salmon steaks.
– Place salmon on hot grill rack. Cover grill and cook salmon 8 to 9 minutes, or until just opaque throughout, turning over once.

Tip

– Salmon is considered an oily fish, which contributes to its healthy attributes.  It is high in protein, Omega-3 fatty acids and Vitamin D.

-Cathy


6 Comments

Filed under BBQ, Seafood

Perfect Peach Daiquiri

At least once a summer, I try to time my vacation travel to include a stop at Stoudt’s Fruit Farm Stand, just off I-78 in Shartlesville, Pennsylvania. Why? Well, they have all kinds of excellent homegrown produce, but really, it’s all about the peaches for me.

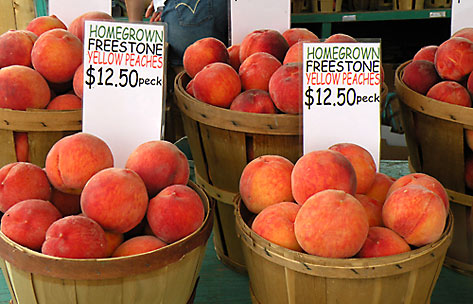
Stoudt’s sells some of the best tree-ripened peaches you will find anywhere, and they’re always worth the trip (or the detour). This afternoon I stopped and purchased a peck of Freestone Yellow Peaches, and they are, once again, mouth-wateringly delicious.

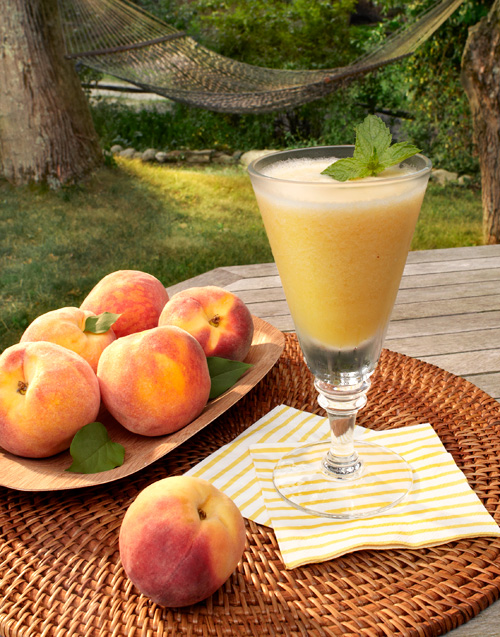
Although we will enjoy most of them plain because they are just too good to consider cooking or baking with, I have set aside a few for my favorite summertime drink, the Peach Daiquiri. A lot of peach daiquiri recipes are overly fussy, involving simple syrup, lime juice, powdered sugar, and even daiquiri mix (oh no!) However, I do not think any of that is necessary, because when you start with peaches this good, the recipe is simple—just three ingredients!

Perfect Peach Daiquiri
Makes 1 drink

1 magnificent tree-ripened peach, peeled, pitted  and cut up
1 cup crushed ice
2 ounces golden rum

– Place all ingredients in blender with tight-fitting lid. Puree until smooth. Pour into a tall glass and serve immediately. If desired, garnish with a peach slice and a mint sprig. Find a sunset view and a rocking chair, and  sip slowly.

Tips – If a peach is truly ripe, the skin will peel off easily using a paring knife. Otherwise, drop peaches in boiling water for about 45 seconds then drop in ice water for about 1 minute.  The skin should come off easily. – White rum can be substituted for golden rum, but the flavor will not be as deep. If using white rum, add a tablespoon of fresh lime juice for extra flavor.

Heather

9 Comments

Filed under Drinks, Entertaining

Summertime Salsa Scoops

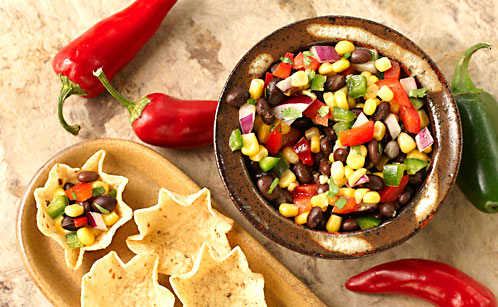
It’s August, and summertime entertaining is in full swing. Are you looking for an easy appetizer to bring to a party or barbecue? Perhaps one that does not require heating up the kitchen? Here’s a recipe that could not be easier—and it’s a crowd pleaser! Start with Tostito’s White Corn Scoops and fill them with our zesty black bean and corn salsa. Sure takes the risk out of any of your guests “double dipping!”

as photographed by our team, alacartepartners

Black Bean and Corn Salsa Scoops
(makes about 2 cups salsa)

1 can (15.5 oz) black beans, rinsed and drained
1 can (7 oz.) corn, drained
1/2 medium red bell pepper, chopped
1/2 jalapeno pepper, seeded and minced
1/3 cup chopped red onion
2 tablespoons chopped cilantro
2 tablespoons lime juice
1/2 teaspoon grated lime peel
salt and pepper to taste
Tostitos Scoops

– In medium bowl, stir together all ingredients except Scoops; cover and refrigerate until ready to serve.

– Just before serving, and using a small spoon, fill Scoops with salsa or let guests scoop as they go!

Tips

-Other fillings include mango salsa, fresh tomato salsa or your most favorite salsa—as long as it is not too watery.

-Fill just before serving time; otherwise the “Scoops” will get soggy.

2 Comments

Filed under Appetizer, Corn, Entertaining, Rice and Beans

Blueberry-Ginger Cobbler Cake

As a kid growing up, I spent many summers in West Virginia where we picked bucket after bucket of fresh berries. My Grandma Arnold made excellent cobbler, but there were  days when it was just too hot to consider working with pastry dough. That’s when Grandma made her quick cobbler, a cake-mix based recipe

that could be assembled in minutes and put in to bake before supper. I enjoyed countless evenings on Grandma’s front porch, eating cobbler for dessert and watching the cars go by. Although we usually had blackberries, raspberries or huckleberries in the Blue Ridge mountains, I now live in New England where we have excellent blueberries. Try this coffee-cake style cobbler for breakfast or brunch with some sweetened whipped cream and a cup of good strong coffee. Thanks for the inspiration, Grandma!

Blueberry-Ginger Cobbler Cake

3 1/2 cups fresh blueberries
3 tablespoons sugar
1 tablespoon minced crystallized ginger
1 1/2 teaspoons  ground cinnamon
1 pkg. (18.25 oz) yellow cake mix (I use Duncan Hines)
1 1/2 teaspoons vanilla extract
1/2 teaspoon ground ginger
Powdered sugar (for dusting)

– Preheat oven to 350°.

– Pick over blueberries, removing any stems. Rinse with cold water and drain in colander.

– In large bowl, stir together sugar, crystallized ginger and cinnamon. Add blueberries and stir gently to coat with sugar mixture.

– Prepare cake mix according to package directions, adding the vanilla and ground ginger.

– Spread blueberries evenly in bottom of 13 x 9-inch baking dish. Pour cake mix over blueberries. Bake 35 minutes or until wooden pick    inserted into cake (not blueberry layer) comes out clean.  Cool on wire rack.

– When cool, dust with powdered sugar. Serve with sweetened whipped cream or vanilla ice cream.

Heather

9 Comments

Filed under Berries, Breakfast, Cake, Dessert, Sweets

A Chili Summer

Ask people how they like their chili and you’ll get a variety of answers. Mild or caliente, vegetarian or con carne, everyone has an opinion. Chili brings out our experimental side, and almost anything can be thrown into the pot; as evidenced by the many chili cook-offs occurring across the country each summer.

One such cook-off that I’ve frequented over the years is the summer chili cook-off at Saratoga Race Course in upstate New York.  Come August at the Spa, it’s High Society  and horses in the paddock, and folding chairs & coolers behind the grandstand.  Saratoga’s 40-day summer meet is the crème de la crème of thoroughbred racing, boasting a stakes race each and every day.  The historic grandstand & race course has even been named one of the worlds great sporting venues by Sports Illustrated magazine.

So if you’re looking for one last day-trip to your never ending summer, set a course for upstate New York, where the horses will be running through Labor Day.  Can’t get to the Spa…  then try my summer chili recipe.  It takes me back there everytime !

as photographed by our team, à la Carte Partners

Joe’s Slow-Cooker Chili
makes about 12 servings

1 lb. ground beef
1 lb. ground Italian sausage (hot or sweet)
1 bottle (12 oz) beer
2 tablespoons olive oil
2 medium-sized onions, chopped
2 cloves garlic, finely chopped
2 cans (28 oz. each) crushed tomatoes
1 can (8 oz.) tomato sauce
1 can (6 oz.) tomato paste
2 tablespoons chili powder (more for spicy)
1 1/2 teaspoons ground cumin
1 1/2 teaspoons oregano, crushed
1 teaspoon salt
1/2  teaspoon ground black pepper
1/2  teaspoon ground red pepper (optional)
1  package (10 oz.) frozen corn
1  package (10 oz.) frozen chopped spinach, thawed
1 can (15 oz.) red pinto beans, rinsed and drained
1 can (15 oz.) white kidney beans, rinsed and drained
1 can (15 oz.) black beans, rinsed and drained

– In large skillet brown ground beef and sausage; drain and spoon into Crock-Pot.
– Add remaining ingredients. Cover and cook on Low for 8 to 10 hours.

Tips

– Leftovers can be frozen.
Any combination of beans can be used.
– Seasoning can be adjusted to your taste buds.
– To make a vegetarian version, remove the beef and sausage  and add your favorite vegetables such as zucchini, carrots, yellow squash, butternut squash,  bell peppers, etc.

-Joe


6 Comments

Filed under Beef, Chili, Crock-Pot, Sausage

Hard-Boiled Eggs or Hard-Cooked Eggs? That is the question!

as photographed by our team, alacartepartners

We recently shot these farm-fresh brown eggs while on location, and it reminded me of something I’ve been meaning to mention. The term “Hard-Boiled Eggs” is a big “no-no” according to Mildred Ying, retired Food Editor of Good Housekeeping Magazine. When I worked for her as an Assistant Food Editor back in the ’80’s, it was one of the first things I learned. The correct term is “Hard-Cooked Eggs.”

The secret to a perfect hard-cooked egg is not to boil them! Here’s the formula: Place eggs in a pot. Cover with cold water. Heat water just to a boil. Immediately remove pot from heat. Cover and let stand 12 minutes. Mmmmm – egg-cellent!…a beautifully cooked yellow yolk every time.

During your travels this summer, take advantage of farm fresh eggs. If you are lucky, you can purchase them locally all year round.

Okay, since I am shelling out tidbits on eggs, here is another one. Is there a difference between brown eggs and white eggs? According to my research, there is one major difference between brown eggs and white eggs. Brown eggs are brown and white eggs are white! That’s it! Just the colors of the shells. There is no difference in nutrition and taste. Brown eggs come from hens with red feathers and red ear lobes. White eggs come from hens with white feathers and white ear lobes.

Now that you are more egg-ucated on the subject of eggs, I am going to sign off before I make another bad pun!

Cathy

5 Comments

Filed under eggs

When Life Gives You Lemons…Make Lemonade!

Ahh, the dog days of summer…the sun is blazing, the sprinklers are sprinkling, and the kids don’t have a care in the world.  A cold and icy  glass of lemonade comes to mind. And I don’t mean the store-bought, fructose-laden, preservative-filled, sickeningly sweet, syrupy, neon yellow lemonade.  I’m talking real lemonade! Make it from scratch.  All you need are lemons, sugar, water and ice!

Joe, Heather and I were shooting at my house one summer day.  I made a fresh batch of lemonade.  We all agreed to take advantage of the beautiful perennials in my backyard and use them as a backdrop to shoot it.  It was a great day. And afterwards, we all sat on my deck and relaxed with refreshing  glass of lemonade.

Here is my recipe.  You can control the sweetness, and you will not believe how much better it is than anything you can buy.  Add a sprig of mint from your garden and you are good to go!!!

as photographed by our team, à la Carte Partners

Cathy’s Fresh Lemonade

Makes  about 7 cups

7 lemons
1 cup sugar
6 cups cold water
ice
fresh mint

– Cut  6 lemons in half and squeeze out juice  to make about 1 cup of juice. Remove any seeds.

– Pour fresh lemon juice and sugar into a large pitcher, stirring until sugar dissolves. Add water, and refrigerate until ready to serve.

– Just before serving, slice remaining lemon.  Add to pitcher with ice and mint.

Tips

– To maximize the amount of juice you get from a lemon,  roll the lemon firmly on counter top before cutting in half .

– Avoid using bottled lemon juice.  The flavor will just not be the same.

– Adjust the sugar to your palate.

– Adding fresh fruit, such as strawberries or raspberries, will add another whole dimension to your lemonade!

– For an adult version, try adding a splash of  flavored vodka!!

Cathy


7 Comments

Filed under Drinks, Entertaining

Trick or Treat for Foodies!

“It’s like Trick or Treat!” exclaimed Karen as she placed a sample of artisanal chocolate into her bulging shopping bag. Karen is our graduate intern/social media consultant and she accompanied us to the Fancy Food Show last week. It was really fun to see the show through her very enthusiastic eyes, and we especially enjoyed watching her alarmed expression as she tasted a very strong espresso at the Italian Pavilion!

I agree with Karen’s Halloween analogy. I always feel like a kid  when I attend the show. Row after row of exhibitors showcasing the finest gourmet food products is a dream come true to a foodie. Olive oils, spices, salts, chocolates, coffees, teas, vinegars, chutneys, cheeses, wines, candies, the list goes on and on. As an attendee, the best strategy is to grab a shopping bag for samples and pace yourself. There is only so much tasting you can do in a day!

I cannot tell you how much fun it is to take in the sights and sounds of this show each year. The show, sponsored by the National Association for the Specialty Food Trade, is open to the trade only. It features more than 180,000 foods and beverages, has more than 2400 exhibitors from 77 countries, and about 24,000 attendees.

As you might imagine, it’s a bit overwhelming, but we do our best to cover as much ground as possible. We like to check out the new products and trends, and of course we pay close attention to the food photography. This year we noticed lots of flavored grilling sauces and spice blends, gluten-free foods, whole-grain crackers, and tea, tea, tea! Watch for upcoming posts on some of the more intriguing new products and recipes we discovered. We can’t wait to share them with you!

Here is a photo by our team alacartepartners that shows a sampling of what we found at the food show.

Heather

6 Comments

Filed under Foodies

Put Some Pop In Your 4th!

A  Fourth of July tradition dear to my heart is the annual party given by my friends John and Terry. We have been a part of it for the past 30 years, give or take a few missed ones. Things change from year to year, whether it be moving to different towns, kids growing up,  or jobs changing, but two things that stay the same are the excellent company and the delicious food John & Terry serve. We all bring appetizers and desserts, and  this year I’m going to steer away from the norm and bring a little “pop” to the party!!!  Seems appropriate, yes?

We photographed this recipe for the Popcorn Board back in December, and we thought it would be a perfect sweet treat for  the Fourth since Heather propped it with an all-American theme.

Parties, pools, baseball, fireworks, and popcorn—what could be better than that! Enjoy this recipe — I know John and Terry’s guests will!!!

Homerun Sugar Popcorn
Makes 8 cups

1/4 cup vegetable oil for popping
1/2 cup unpopped popcorn
3 tablespoons white sugar

– Heat oil in medium-sized pan until hot.
– Add popcorn and sprinkle all of the sugar over it.
– Cover and shake continuously until popped.

Recipe courtesy of the Popcorn Board…

as photographed by our team, alacartepartners

Cathy

5 Comments

Filed under Popcorn, Snacks, Sweets

It’s All About The Coconut!

Frosted cupcakes piled high with coconut chips.  Yes, coconut chips!!  I came across them at a food show and thought they would make a beautiful complement to chocolate cupcakes frosted with vanilla buttercream.

We shot this cupcake at the studio one day, and it has become one of our all-time favorite shots. To make a more dramatic presentation, I used a  Texas-size cupcake pan lined with extra-large paper liners.  (A standard cake mix will make  10 to 12 cupcakes.) I frosted the cupcakes with a rich vanilla buttercream.  To give the coconut a hint of color and to bring out its flavor, I  very lightly toasted the coconut chips. (Place them in single layer on a baking sheet, and toast in 275° oven for about 5 minutes.)

The best coconut chips are just pure dried coconut—organic, unsweetened and sulfite-free.  You can eat them straight from the package, add them to your favorite trail mix, stir them into a fruit salad—be creative! Coconut chips may be a little harder to find than shredded coconut, but they are certainly worth the search.  I found them at Trader Joes, and they are also available at natural food markets. Or, you can order them online.  Here are a few online resources: Tropical Traditions,  Nuts Online, or Melissa’s.

as photographed by our team, alacartepartners

Cathy

4 Comments

Filed under Chocolate, Cupcakes, Dessert

Luscious Limoncello

Last week, I enjoyed an unforgettable dinner at Sonny’s on the Avenue, an Italian ristorante in Verona, New Jersey owned by Tommy Malanga and his wife Alyssa Alia, a food stylist, chef, and all-around wonderful person. The meal was amazing from start (those eggplant meatballs!) to the finish (that silky ricotta cake!)

photo courtesy of Eugene Knowles Photography


At the end of the meal, when I thought I could not possibly consume even one more small sip or bite, Alyssa presented our table with a basket of fresh biscotti and a frosty bottle of her prized Limoncello. Unable to resist, our table dutifully dipped the biscotti in our glasses of Limoncello. Ah, la dolce vita!

The always gracious Alyssa was kind enough to share her recipe with me so I could post it. Limoncello needs time to age, so get started soon!

Alyssa’s Limoncello

Limoncello is an Italian liqueur made from lemons native to the Amalfi Coast (Capri, Sorrento and Liguria). Limoncello is always served ice cold from the freezer after dinner.

45 large lemons (scrubbed and washed)
2 (750ml) bottles grain alcohol, such as Everclear (151 proof)*
1 (1.75 liters) or 2 (750ml) 80-proof good quality vodka
6 cups bottled or distilled water
8 cups sugar
Large gallon glass jar (such as a Sun-tea jar)

*Due to its high alcohol content, grain alcohol can be hard to find in many areas, and may be illegal in your state. If so, it’s fine to substitute vodka for the grain alcohol.

1. Pour all alcohol in jar.

2. Using vegetable peeler or paring knife, carefully peel off just the yellow skin of the lemons. (It is very important that you do not have any white part left underneath the lemon peels, as this will make the mixture bitter). Try and make the peels as large as you can; this will make it easier to strain the mixture later.

3. Place peels in alcohol.

4. Cover jar tightly and place in a cool (not cold) dark place.

5. Allow mixture to sit for a minimum of 3 weeks or up to 3 months. Stir gently every few days. The longer the lemon peels sit the better the color and flavor. A good readiness test is to take one lemon peel and see if it snaps when you bend it. If it does, it is ready.

6. In large saucepan, bring water and sugar to a boil over medium high heat for 5 minutes. Let cool completely.

7. Strain lemon mixture into another glass container, using a large fine mesh strainer and paper coffee filters. (Note: this takes time and is a little messy). Repeat the straining process back into the original glass jar.

8. Add cooled syrup and watch your Limoncello come to life! Return jar to a cool dry place for at least another 2 weeks.   After 2 weeks, pour Limoncello into small bottles and store in refrigerator or freezer for up to 3 months.

9. Limoncello should be served ice cold from the freezer. It’s terrific as a cordial after dinner, and great on vanilla ice-cream.


Tips

– I make a double batch (90 lemons at time—a case of lemons usually has around 90 lemons) and usually start my batches in the summer to give out at Xmas time.

– Limoncello makes a perfect gift. Start saving decorative bottles from inexpensive stores such as Home Goods, Marshals, Target, the Container Store, or the Christmas Tree Shop. Make sure tops are airtight—you can even wax the corks to make sure they are well sealed.

14 Comments

Filed under Drinks, Entertaining, Restaurants, Reviews

Grilled Pizza ALACARTE !

As you might imagine, lunchtime at a food shoot is an event. We have a stash of take-out menus for every imaginable cuisine, and where to place the lunch order is always a lively debate. But, since we all love home-cooked food, we often enjoy our own creations. At the carriage house studio, we are fortunate to have access to a gas grill, so we’ve become quite expert at grilling pizzas for lunch. Try this, and you’ll never make a pizza by pre-heating your oven to 500° again!

Here’s the Recipe:

Makes 4 servings

1 cup thinly sliced onions
1 tablespoon butter or margarine
1 teaspoon sugar
olive oil
1 package (16 ounces) prepared pizza dough, at room temperature
½ cup marinara sauce
3 small plum tomatoes, sliced
1/4 cup shredded mozzarella cheese
1/2 teaspoon Italian seasoning, optional
fresh basil leaves, thinly sliced

– In a large skillet over medium heat, sauté onions in butter, stirring often. When onions have softened, stir in sugar. Cook and stir until golden. Set aside.

– Preheat gas grill to medium high.

– Lightly brush baking sheet with olive oil. On lightly floured board, divide dough into 4 equal pieces. Using your hands, stretch each piece into rounds, approximately 7 inches in diameter. Transfer to baking sheet, and brush with olive oil.

– Place rounds directly on grill; close lid. Cook for 2 minutes, then, using tongs, flip. Immediately spread each pizza with 2 tablespoons marinara sauce. Top with tomatoes and the caramelized onions. Sprinkle with cheese and Italian seasoning. Close lid. Cook 2 minutes longer or until cheese is melted and bubbly.

– Sprinkle with sliced fresh basil.

Tips

– If you can’t find fresh pizza dough, try your local pizza place. They may sell you a ball of dough.

– An alternative to fresh pizza dough is 1 can (13.8 oz) Pillsbury refrigerated classic pizza crust. Remove crust from can; cut crosswise into 4 pieces. Continue with directions above for stretching each piece into 7-inch rounds.

– Use different cheeses, such as shredded provolone, cheddar, or Monterey Jack.

– Top with your favorite grilled veggies.

– For a Mexican version, substitute salsa for marinara sauce; pepper jack cheese for the mozzarella; cilantro for basil.

Heather, Joe, Cathy


5 Comments

Filed under BBQ, Pizza

Back, by POP-ular demand!

Back in April, we ran a post, Pop ‘Til You Drop, that featured a recipe for an addictive snack recipe, Popcorn con Pesto. That post generated so much interest that we thought we should introduce you to another studio favorite from our December shoot for the Popcorn Board. This spicy-hot recipe for Cajun Corn is just perfect for casual summer gatherings where a little southwestern flavor is just the ticket. Serve this with a few frosty Margaritas by the pool… yes, that’s happy snacking!

Recipe courtesy of the Popcorn Board….

Cajun Corn

Makes 2 1/2 quarts

  • 2 1/2 quarts popped popcorn
  • 1/4 cup butter, melted
  • 1 teaspoon paprika
  • 1/2 teaspoon onion powder
  • 1/2 teaspoon garlic powder
  • 1/4 teaspoon cayenne pepper
  • 1 teaspoon lemon pepper
  1. Pour butter over warm popcorn.
  2. Combine remaining seasonings and sprinkle over popcorn; toss to mix.
  3. For crispy popcorn, bake in 300° oven for 5 to 10 minutes, stirring once.

11 Comments

Filed under Entertaining, Healthy, Popcorn, Snacks

Double the Chocolate Strawberries

I can’t think of an easier dessert that yields as many “oohs” and “ahhs” as chocolate dipped strawberries. Perfect on their own, and truly elegant when garnishing a plate of cookies or brownies, these berries are a hit every time. As easy as they are to make, there are a couple of secrets for success: 1) use the freshest ripe berries you can find (local is best!) 2) do not burn the chocolate and 3) always make more berries than you need or keep them hidden until guests arrive! So, here, in honor of strawberry season, we give you:

Double the Chocolate Strawberries
Makes 12 dipped strawberries

1 dozen medium-size fresh strawberries, rinsed and patted dry
4 squares (4 ounces) semi-sweet baking chocolate
2 squares (2 ounces) white chocolate

– Line a baking sheet with wax paper. In small glass bowl, microwave chocolate on HIGH (100%) power for 1 minute. Stir until chocolate is completely melted. (If, after stirring well, there is still some unmelted chocolate,  microwave for another 10 seconds, then stir until melted).

– Hold strawberry by stem and dip into the melted chocolate, covering about 3/4 of the berry. Gently shake off excess chocolate and  place on wax paper-lined baking sheet. Refrigerate until set, about 15 minutes.

– In small glass bowl, microwave white chocolate on MEDIUM (50%) power for 1 minute. Stir until chocolate is completely melted. Carefully transfer melted chocolate to a zipper-style plastic sandwich bag. Squeeze out excess air and seal bag.

– Using scissors, snip a tiny corner of the bag. Squeeze chocolate from bag onto the dipped berries, using a random pattern. Refrigerate until set, about 15 minutes. Transfer berries to serving platter. Leftovers (ha!) may be stored in the refrigerator overnight.

Tips

– Recipe can easily be doubled, tripled and more!!!!

– Triple Chocolate? I like the way you think! Using dark (bittersweet) chocolate, follow the same procedure for the white chocolate. Pipe or drizzle in a criss-cross pattern over the white chocolate. Pretty!

– I am a big fan of Baker’s Chocolate Baking Squares, and you can find them in any supermarket.

– Think outside the strawberry! Try dipping kiwi slices, banana halves, pineapple chunks, and more. The trick is to pat the fruit dry before dipping.

Heather

2 Comments

Filed under Berries, Chocolate, Dessert, Entertaining, Sweets

Refreshing Raspberry Mojito

Fresh mint is super abundant this time of year. The crop in my garden is already a bit out of control, and it’s only May! I use mint all summer long in iced tea, fruit salads, tabbouleh, and more. But, hands-down, the best use for fresh mint is for making an icy-cold Mojito on a hot summer evening.

The Mojito is a traditional Cuban cocktail made with lime juice, sugar, sparkling water, white rum, and of course, fresh mint. There are a variety of variations to the basic recipe involving all kinds of ingredients—ginger, pomegranate, mango, blood orange, coconut, even chili lime! Basically, the Mojito is only limited by your imagination. Recently, Cathy made this gorgeous Mojito with some beautiful fresh raspberries. It was delicious—and so pretty we had to shoot it!

as photographed by our team, à la Carte Partners

Raspberry Mojito
Makes 1 serving

8 fresh mint leaves
1/2 ounce freshly squeezed lime juice
1 teaspoon superfine sugar
2 ounces white rum
2-3 ounces seltzer
4-6 fresh raspberries

– Place mint leaves, lime juice and sugar in a highball glass (something tall and narrow is perfect). Using the straight end of a wooden spoon, gently press on  leaves to release flavor (“muddle” is the official term).

– Fill glass with ice cubes. Pour in rum. Top off with seltzer. Drop in raspberries, and sip!

Heather

30 Comments

Filed under Berries, Drinks, Entertaining

Hot Artichoke Dip

(For all my PAWS friends)

Last week, PAWS (Pet Animal Welfare Society) had its annual wine tasting fundraiser.  I have been preparing the appetizers for the event for years, and  a mainstay dish that I serve is Hot Artichoke Dip.  It is a raving hit each time.  There are no surprises with the recipe—it is basically 4 ingredients, but for some reason the crowd goes wild for it.  For parties or events, I triple the basic recipe and bake it in a large casserole dish.

PAWS is a nonprofit no-kill animal shelter located in Norwalk, CT, that I have been volunteering with for the past 7 years.  PAWS uses a network of volunteers and paid staff who provide shelter, medical care and affection while finding loving homes for homeless or abused dogs and cats. I have to say it is the best thing I have done—both for me and the animals. Their website is www.pawsct.org. Feel free to send a donation if you are so inclined.  The animals will greatly appreciate it.

Now, for all my PAWS Artichoke Dip fans, here is the recipe!!

Hot Artichoke Dip
Makes 2 and 1/2 cups

1 can (14 ounces) artichoke hearts, drained and chopped
1 cup grated Parmesan cheese
1 cup mayonnaise
1/8 teaspoon garlic powder
paprika
assorted crackers, bread cubes, cut up vegetables

– Preheat oven to 375°.  In medium bowl, stir together artichoke hearts, cheese, mayonnaise and garlic powder. Spoon into a 1-quart baking dish. Sprinkle lightly with paprika.
– Bake about 30 minutes, or until hot and bubbly. Serve with crackers, bread cubes or vegetables.

Tips

– Recipe can easily be doubled or tripled for a crowd.

– Do not use marinated artichokes.

Cathy
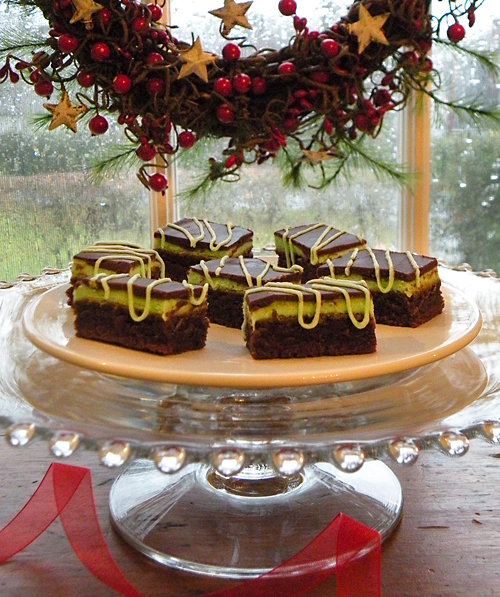
2 Comments

Filed under Appetizer, Artichokes, Dips, Entertaining

Best-dressed Chocolate Truffle Cake

To bake or not to bake? That is often the question in our hurried world. We all like to serve up something special, but we do not always have the luxury of time. My cousin ML, who lives in New York City, likes to say “If I can buy it within a six-block radius, I consider it homemade!” Luckily, as my cousin could attest,

there are an increasing number of top-quality desserts available in the freezer section of better grocery stores.

It’s easy to dress up a store-bought confection, especially if you start with a quality product. In this photo, one of my favorites from alacarte, our food stylist Cathy Paukner began with a boxed and frozen single-layer chocolate truffle cake. Using a fine mesh sieve, she dusted it lightly with unsweetened cocoa powder, and added a few luscious fresh raspberries and a sprig of mint. Presented on a pretty pink porcelain plate, the dessert looks as if you had spent hours in the kitchen baking and garnishing, when in fact, all you did was purchase and thaw. Wouldn’t “Purchase & Thaw” be a great name for a new food blog? Maybe my cousin could start it…

Heather

2 Comments

Filed under Chocolate, Dessert, Entertaining, Foodies

LOL… Lots of Lobster!

New England. While it’s often cold and rainy, and while the winters are ridiculously long, we do have more than our fair share of perks to balance things out—gorgeous autumn leaves, the Red Sox, maple syrup, the list goes on and on. And no doubt about it, we have the world’s best lobster—and really, is there anything better than that?

A few weeks ago, I stopped at Danny’s Drive-In, one of those classic drive-ins where it’s like stepping back in time. Danny’s has been serving up cheeseburgers, milkshakes, fried clam strips, onions rings and more since 1935. (Health food it’s not!) When I pulled into the parking lot, I immediately noticed a sign that read “Yes, we have lobster rolls!” I promptly placed my order and, well…WOW! This was easily one of the best meals I’ve enjoyed ever.

The beauty of a lobster roll is in the simplicity. A soft hot dog bun piled high with warm, buttery lobster meat, served with a little cup of drawn butter and a lemon wedge. That’s it. That’s all you need. Take a bite and let the butter drip down your chin. Mmmm!

Heather

Leave a comment

Filed under Lobster, Restaurants, Reviews, Seafood

Bone Suckin’ Chicken

When Autumn arrives each year, we put everything that is remotely associated with summer weather away for the winter, including the grill. Come May, when the warm weather finally returns, it’s once again grilling time. Out comes the patio furniture, the umbrella, the garden  “chochkes” and of course, THE GRILL. We are once again ready for summer!

I have been saving a jar of Bone Suckin’ Sauce, produced by Ford’s Gourmet Foods, for our first BBQ post of the season. I picked up a sample at the Fancy Food Show last year.  It was worth waiting for!  I decided to use it on chicken, and believe me, it tasted every bit as good as it looks in this picture!  The recipe is so easy and the flavor screams BBQ.  You can find the sauce at Whole Foods Markets, Stew Leonards, and specialty food stores. Or, you can order Bone Suckin’ products from their website. Anyway, here’s the recipe (I’m telling you, it is so easy!)

as photographed by our team, alacartepartners


Bone Suckin’ Grilled Chicken

Makes 4 servings

3 pounds chicken parts
1 cup Bone Suckin’ Sauce

– Spray grill grate with non-stick cooking spray, then preheat grill to medium heat.

– Place chicken on grill and cook about 40 – 50 minutes, turning every 10 minutes, until juices run clear.

– During last 20 minutes of cooking, brush with Bone Suckin’ Sauce, turning frequently. (Total cooking time is 40-50 minutes).

Tip

– Serve with grilled corn on the cob.  Soak the whole cobs in a pot of cold water for 15 minutes. Remove from water and pull the husks of the corn back without removing them. Remove and discard only the silk, keeping the husks attached. Brush corn with vegetable or olive oil, and sprinkle it with salt or a seasoned pepper. Wrap the husks back over the kernels and tie each ear with a piece of  husk or twine. Place the  corn on grill, rotating it occasionally  to prevent it  from getting charred too much on one side. After a couple of turns, place the corn  on  indirect heat and close the cover.  The total cooking time should be about 15 minutes.

Cathy

1 Comment

Filed under BBQ, Chicken, Reviews

Cheese, Please!

On a gloomy & rainy spring afternoon a few weeks ago, I met a colleague for lunch in the city. She took me to Artisanal Fromagerie & Bistro, a charming place just around the corner from her office on Park Avenue. “Everything’s good here,” she said as the waitress handed us menus, “but I usually  order the Cheese Board.”  I quickly scanned the menu and, although there were lots of tempting choices, I decided to take Helene’s advice and ordered the Cheese Board.

The waitress reappeared with a beautifully arranged plate featuring wedges of  three different cheeses, a halved fresh fig, a cluster of red grapes, pear slices, walnut halves, and delicate spring greens. Did I mention we also had a basket of fresh baguette slices? Mmmm. A little bite of cheese, a nibble of pear, a crunch of walnut, perhaps another slice of bread….just a happy mix of flavors and textures. So very civilized!  My day had brightened considerably by the end of this wonderful meal. Upon leaving, I requested the names of the three featured cheeses. They were Buche du Poitou (a French goat cheese), Coolea, and Cashel Blue (both Irish cow’s milk cheeses).

Try this at home… a Cheese Board is so simple to make. Start by selecting a couple of interesting cheeses—perhaps a sheep’s milk, a cow’s milk and a goat’s milk. Allow one ounce of each cheese per serving. Arrange your Cheese Board with the cheeses, lightly dressed (just a touch of oil and vinegar) greens, nuts, fruit, and of course, fresh French bread. Bon Appetit!

Note: the selection of cheeses in our photo are a Rosenborg Castello (Danish Blue), a Wisconsin Gouda, and a Chevre.

Heather

2 Comments

Filed under Cheese, Entertaining, Main Dishes, Salad

Brie ‘n Basil Bites

Next to my Famous Chicken Casserole that’s technically not even mine, this pretty little appetizer is my most requested recipe. Last week, my loyal & hardworking foodie friend Patti whipped up a double batch of these for me to take to a charity event for which I had volunteered to cook. (I have really nice friends.) The Brie ‘n Basil Bites were, as always, a big hit, and there were numerous requests for the recipe. Luckily, I had the foresight to ask Patti to save some of the cheese mixture so I could take it to the studio the next day and have Joe shoot the “bites.”  So here goes, an enticing photo from ALACARTE and the recipe!

Brie ‘n Basil Bites

Makes about 4 dozen

Adorable and totally delicious—as every good appetizer should be.

1/4 cup fresh basil leaves
1 small garlic clove
4 ounces Mascarpone cheese
4 ounces  Brie or Taleggio cheese (rind removed), cut into 4 pieces
3/4 ounce lean prosciutto, minced
about 4 dozen crisp crackers, such as Wheat Thins Big
2 tablespoons pine nuts, lightly toasted
about 4 dozen tiny basil (or parsley) leaves

– In food processor with motor running, add  basil and garlic through feed tube and process until minced.  Add Mascarpone and Brie cheeses; process until smooth.  Scrape down sides of bowl.  Add prosciutto.  Process just until combined. (At this point, you can cover and refrigerate mixture for 1 or 2 days.)

– Using a pastry bag fitted with a star tip, pipe cheese mixture onto each cracker or  use a small spoon to dollop  cheese mixture onto crackers.

– Garnish with pine nuts and basil leaves.  Serve immediately.

Tips

– There is nothing as wonderfully creamy as Mascarpone, an Italian triple cream cheese. If you cannot find Mascarpone, mix together 4 ounces of best-quality cream cheese with 2 tablespoons heavy cream as a substitution.

– You can substitute ham for prosciutto.  A suggestion would be Black Forest ham, but any cooked ham would be fine.

– Taleggio is a pungent cow’s milk cheese from the Lombardy region of Italy. The cheese is cave aged and becomes quite tangy.  Taleggio is sometimes referred to as “Italy’s answer to Brie!”

Heather

8 Comments

Filed under Appetizer, Cheese, Entertaining, Foodies

Curry in a Hurry

I was driving home to Connecticut after a long workday in Manhattan, and I got a craving for curry.  Don’t ask me why, it has been a long time since I’ve had it.  Anyway, I had taken a few chicken breasts out of the freezer to defrost for dinner, so I knew I had that to start with when I got home.  I really didn’t want to stop at the store on the way home, because as it is, I feel like I live in the supermarket for work!!  So when I got home, I searched my cabinets and refrigerator to see what I could make that would satisfy my curry craving.  I had red peppers, potatoes, and coconut milk (the real stuff, not the pina colada kind!) and all the spices I needed.  I also found duck sauce which I knew would add a little bit of sweetness and a little bit of tartness.  I am all about quick meals during the week, so here goes—Cathy’s Curry in a Hurry!  Serve it over brown or white rice.

Curry in a Hurry

Makes 2 servings (recipe can be doubled)

3 tablespoons olive or vegetable oil
4 baby Yukon gold potatoes, cut into 3/4-inch pieces
1 small red pepper, thinly sliced
1 small onion, chopped
1 garlic clove, minced
1 teaspoon curry powder
1/2 teaspoon ground coriander
1/2 teaspoon ground cumin
1/4 teaspoon salt
1/2 pound boneless, skinless, chicken tenders, cut into 1/2-inch pieces
1 teaspoon duck sauce
1/2 cup coconut milk

– In large skillet, heat 2 tablespoons of the oil over medium heat.  Add potatoes, red pepper and onion; cook, stirring, until vegetables are tender, about 10 minutes.  Add garlic; cook 1 minute.

– To vegetables in skillet, add curry powder, coriander, cumin and salt; cook, stirring, for 1 minute.  Remove mixture from skillet.

– Add remaining 1 tablespoon oil to skillet; heat until hot.  Add chicken; cook, stirring, until chicken is cooked through, about 8 minutes.  Stir in duck sauce.

– Return vegetable mixture to skillet.  Stir in coconut milk; cook and stir until heated through.

Tips

– The next time you get a craving for something,  rustle through your kitchen and see what you can find. It’s creative and fun to put ingredients together—and even more fun to know you came up with your own creation!

– Real coconut milk can be found in Asian section of your supermarket.

– If you have frozen peas, throw a handful into the skillet with the coconut milk.

Cathy
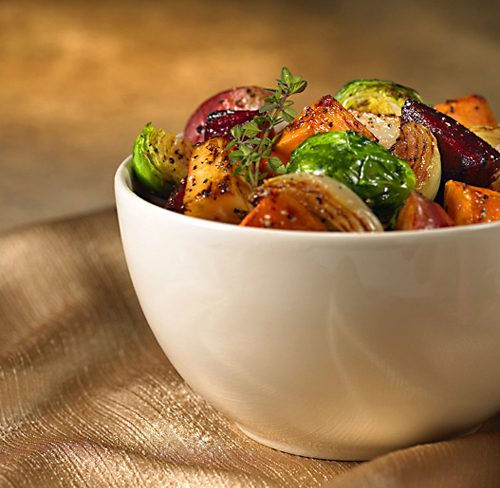
5 Comments

Filed under Chicken, Main Dishes, Potatoes, Skillet Dinner

Nuts About Almonds

Ah, almonds. Natural, blanched, toasted….sliced, chopped, slivered, ground, or whole—all good, so so good!

There are countless ways to cook with almonds. They can be added to  your favorite salads; sprinkled over vegetables; stirred into cake, cookie and muffin batters; used to coat chicken or fish; ground into nut butter; well, the list goes on and on. But, perhaps the simplest and best way to enjoy almonds is as a snack straight from the shell.

Joe keeps a large container of almonds in the studio, and after the three of us “catch up” with a cup of coffee and treats from Stew Leonard’s (believe me, it’s the best part of the day), I head straight to the almonds for a great big handful!

According to the Almond Board of California, almonds are cholesterol-free and just a handful a day may help you maintain a healthy heart and healthy cholesterol levels. They are also an excellent source of vitamin E,  and a good source of fiber. So why not make your heart happy and pop a few almonds into your mouth each day?  You (and your heart) won’t regret it.

p.s Let me know what your favorite almond recipe is!

Cathy
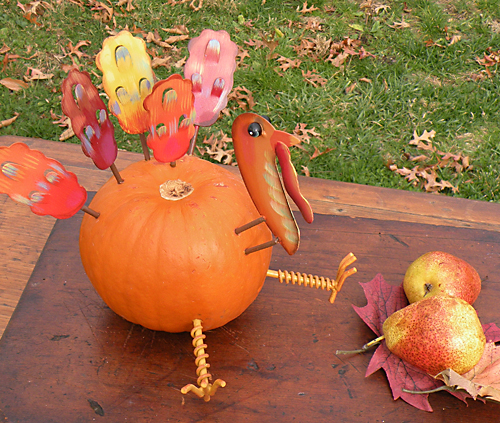
1 Comment

Filed under Healthy, Snacks

Pop ’til You Drop!

Some of the most fun we’ve had in the studio of late was a recent shoot we did for The Popcorn Board. We photographed  (and sampled!) a variety of pop-a-licious recipes for their website redesign. We shot popcorn snack mixes, popcorn balls, popcorn pie, popcorn bars, and more. It seemed like the popping never stopped! Our hands-down favorite recipe was the Popcorn Con Pesto. Warning: it’s highly addictive!

Popcorn Con Pesto
Makes about 5 quarts

5 quarts popped popcorn
1/2 cup  butter or margarine
1/2 cup pine nuts (optional)
1/3 cup Parmesan cheese
1 tablespoon dried basil leaves, crushed
1 teaspoon dried parsley, crushed
1 teaspoon garlic powder

– Put popped popcorn in a large bowl and keep warm.

– In small saucepan, melt the butter; add pine nuts, Parmesan, basil, parsley and garlic powder.

–  Stir to blend.

– Pour over popped popcorn, stirring well.

Heather

Recipe courtesy of the Popcorn Board

9 Comments

Filed under Entertaining, Popcorn, Snacks

Berries, Balsamic, Brown Sugar…

Who would ever think that strawberries, balsamic vinegar and brown sugar would be a tantalizing flavor sensation? I was skeptical when I was introduced to this at a shoot a few years back.  I vividly remember an account executive, from a public relations firm representing strawberries, arriving at the studio with cases of beautiful ripe strawberries, aged balsamic vinegar and brown sugar.

She rinsed the berries, and proceeded to pour the vinegar and brown sugar into separate small bowls.  She told us to pick a berry, dip it in the vinegar, and then the sugar.  I thought to myself, there’s no way I am going to like this! I have to tell you I was more than pleasantly surprised.  The flavor combination was unbelievable.  The robust, slightly sweet zing of the vinegar combined with the sweetness of the berry and the brown sugar—well, it’s beyond yum. It’s a unique taste sensation you will not soon forget. Try it!

Hint: For the best flavor, use a good-quality aged balsamic vinegar,  turbinado sugar, which is a raw cane sugar  such as Sugar in the Raw from Hawaii, and the freshest local strawberries you can find!

Serve these as an appetizer or dessert. And let me know how you like them!

Cathy

5 Comments

Filed under Appetizer, Berries, Dessert, Sweets